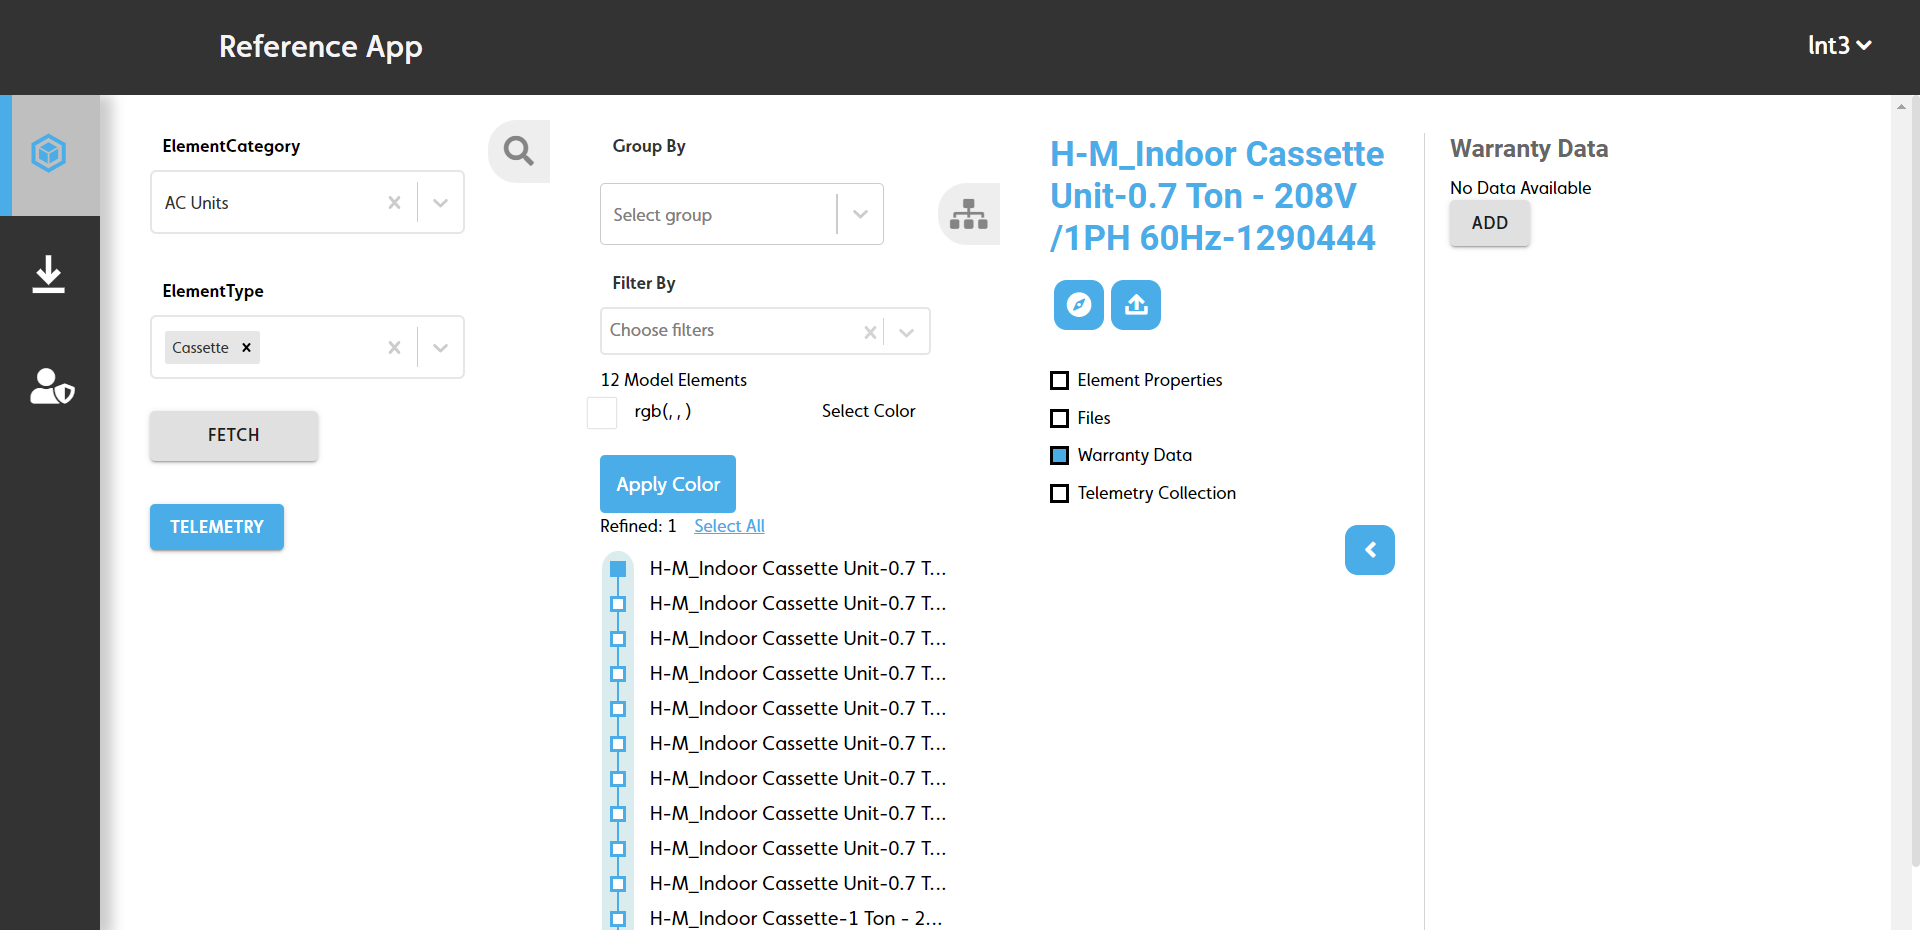
Add warranty
Adding warranty data to an element#
To add warranty data to an element, do the following:
- Fetch the elements you want to add warranty data to. For more information, see Fetching model elements.
- On the Model Elements pane, click the element you want to add warranty data to.
- On the Related Items pane, select the Warranty Data checkbox.
- On the Warranty Data pane, click ADD.
- Complete the following fields:
- Warranty Description: Enter a description for the warranty information.
- Warranty Start Date: Enter the warranty start date.
- Warranty Duration: Enter the warranty end date.
- Click SAVE.
Figure: Add warranty data panes
Code reference#
Add warranty data flow diagram#
The following diagram demonstrates the API calls used to create warranty data and link it to the relevant model elements:
Figure: Data flow diagram for adding warranty data to model elements
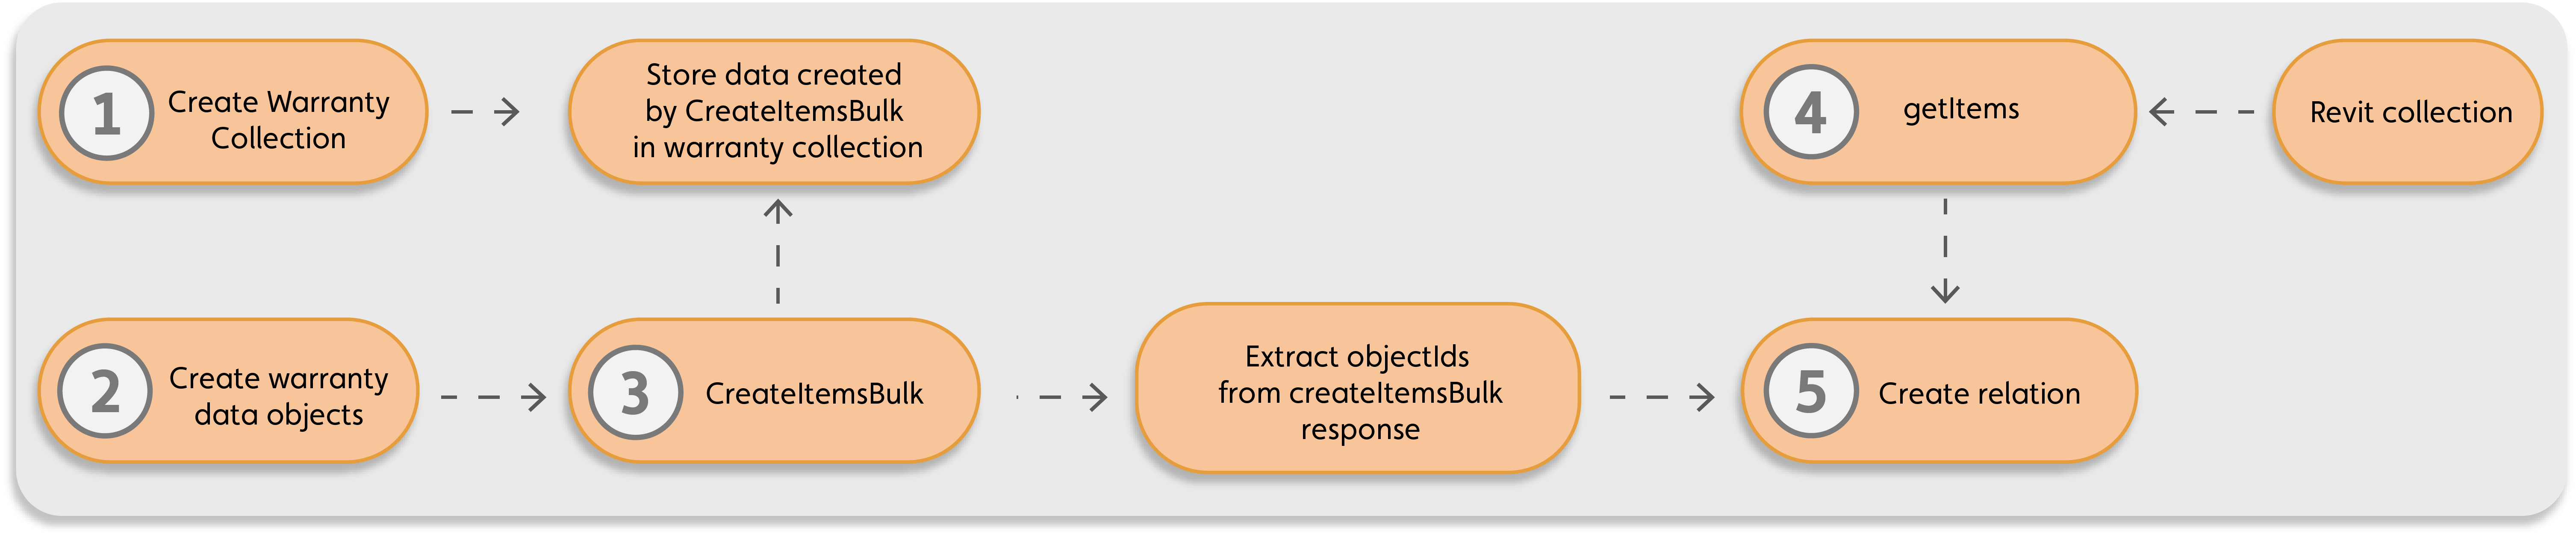
| Callout | Process |
|---|---|
| 1 | During the project setup, IafItemSvc.createNamedUserItems() in setup.js creates a named user collection, Warranty Collection, to store warranty data. |
| 2 | Create data objects for the warranty information, which contain the warranty date and commissioned date properties, with the option to add more data. |
| 3 | IafItemSvc.createItemsBulk() creates related items of the warranty information data objects and adds them to the Warranty Collection. |
| 4 | IafItemSvc.getItems() gets the model elements to assign warranty data to, for example, OST_Doors from the Revit collection. |
| 5 | IafItemSvc.addRelationsBulk() creates relations between the fetched related items from the Revit collection and warranty related items by way of their object ids. |
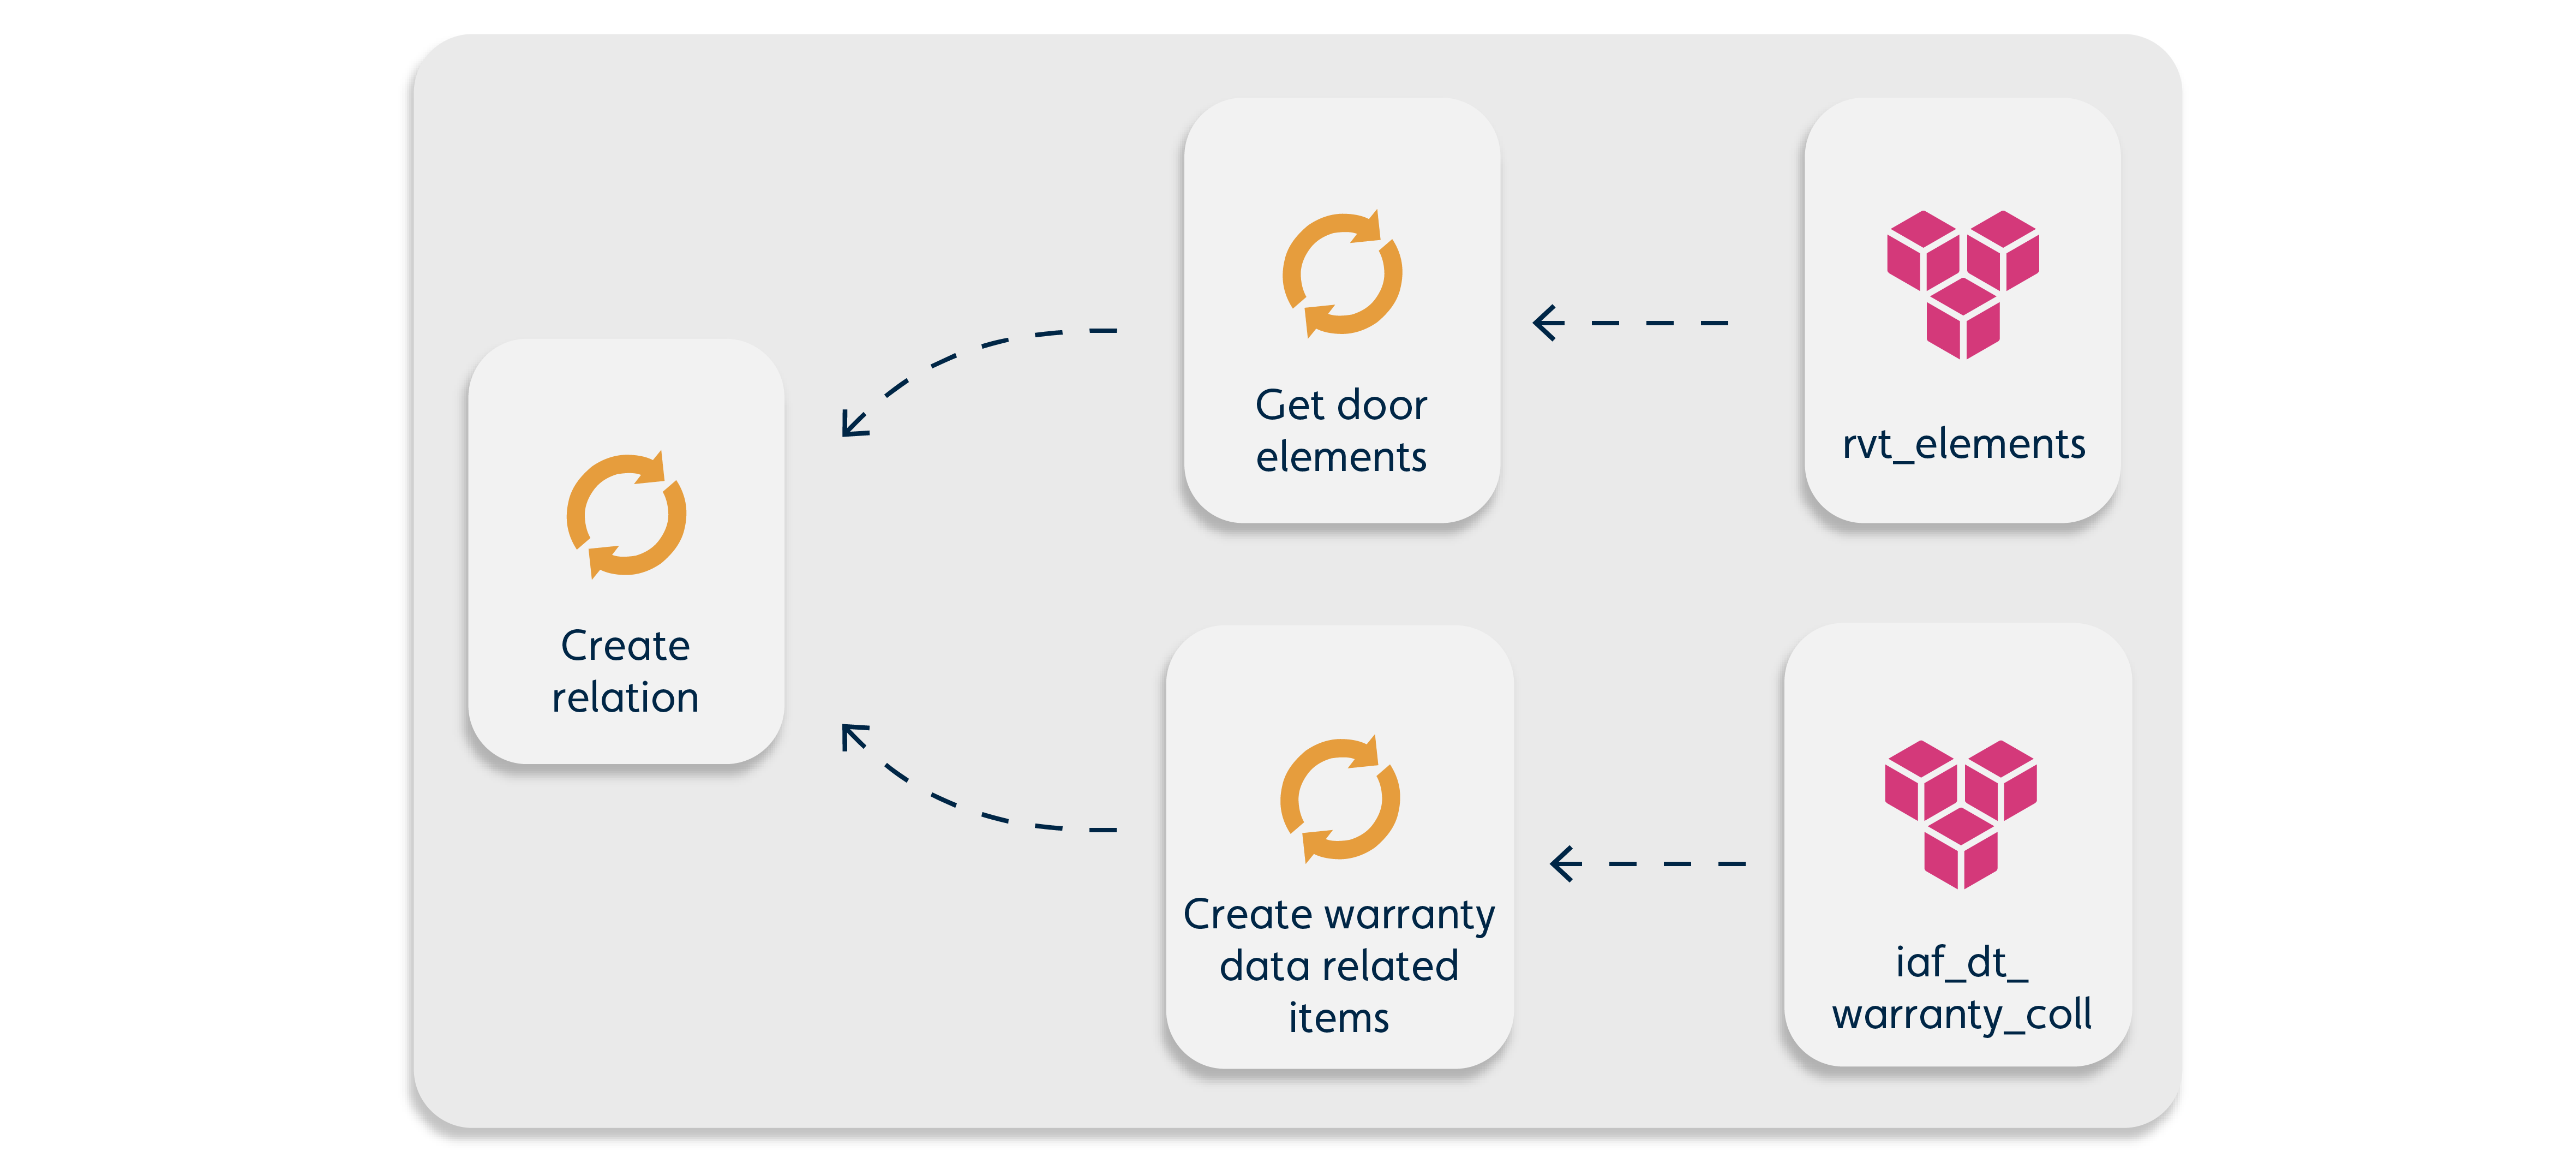
Warranty functions data flow#
createWarrantyAndElementRelation()#
The following graphic demonstrates the data model for the createWarrantyAndElementRelation() method in the setup.js file:
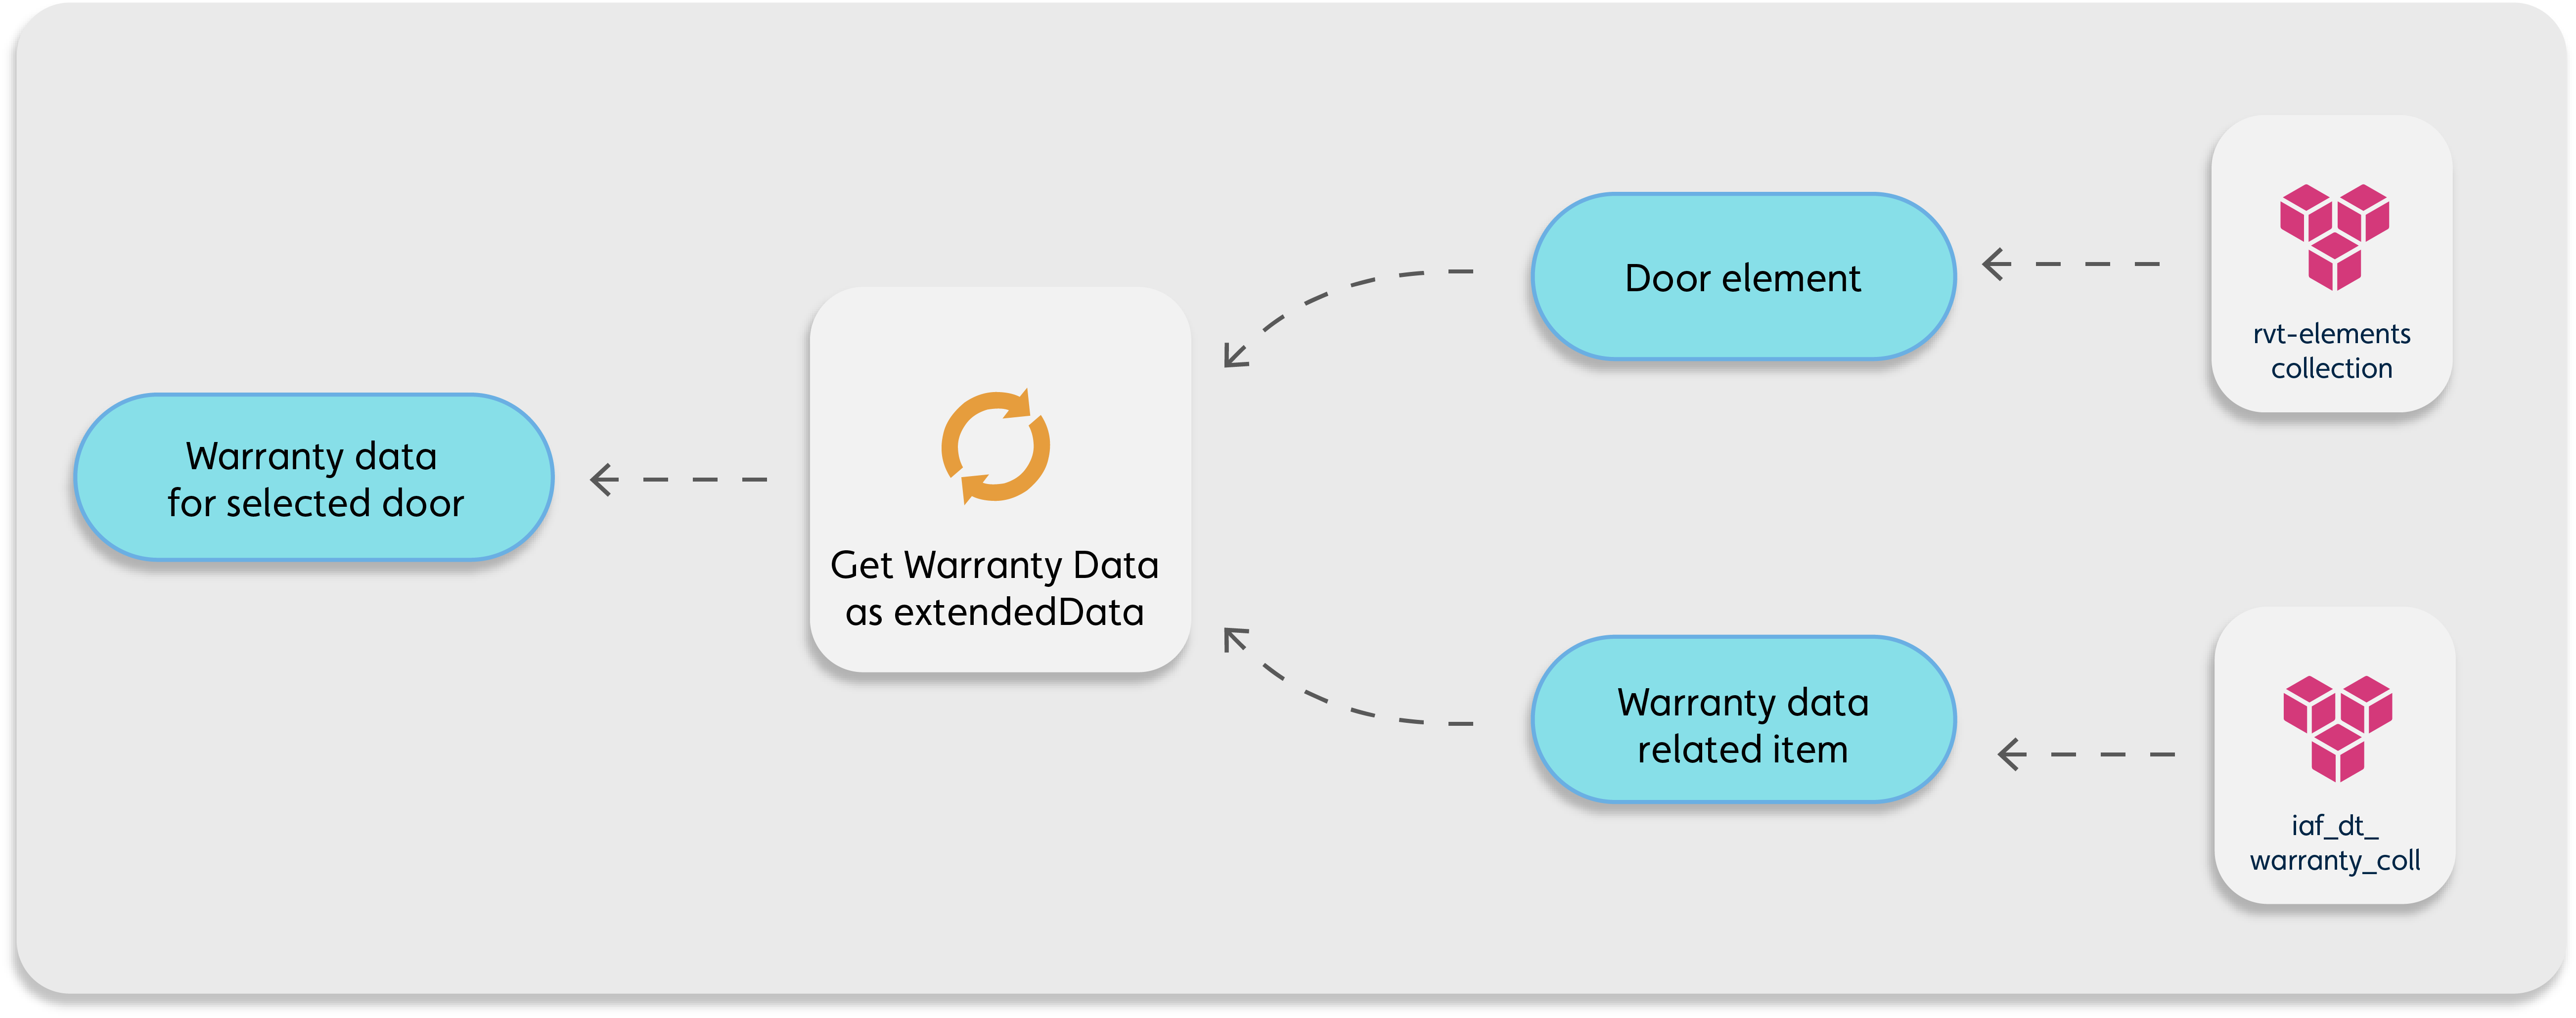
getElementsWarrantyData()#
The following graphic demonstrates the data model for the getElementsWarrantyData() method in the iaf_dt_model_elements.js file: