Exporting an AutoCAD model
Overview#
Before you begin, you need to gain an understanding of which AutoCAD 2D entities are supported and the considerations for each. For more information on this, see Export consideration for entities.
How to export an AutoCAD model#
To export an AutoCAD model, do the following:
In your AutoCAD app, open the project you want to export. Ensure that every entity you want to include is visible and isolate or hide any entities that do not want to include in the export. Only visible entities in the Model Space will be exported.
Before you export the model, adjust the model display using the zoom feature to fit everything you want to export within the window so that after you export it as a HOOPs file, all model elements are contained within the 2D sheet’s frame.
In the IPA ACAD plug-in, on the main page, click the project you want to export, then click Upload.
Note: If it is a new project and it doesn't appear, click the Refresh button.
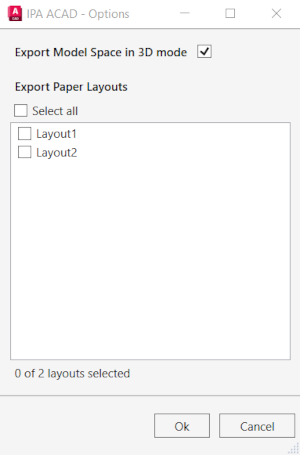
When prompted by the plug-in, in the IPA ACAD - Options window, select the paper layouts you want to export, then click Ok. The Export Model Space in 3D Mode option is selected by default. De-select if you wish to export a 2D drawing. Once the model export begins, the plug-in will show the progress of the export and upload. To suspend a model upload, click Cancel.
When the export and upload completes, click Ok.
To load the model in your digital twin application, complete the following steps:
a. Open your digital twin application.
b. On the sidebar, click the Manage Models icon.
c. From the Select Model drop-down, select your model.
d. From Select Model Version, select the checkbox of the version you want.
Note: When the upload is complete, you can also find the BIMPK file in your Temp folder.