User Groups tab
Use the User Groups tab to view a list of an application's user groups. Click a user group to view more detailed information, and with the appropriate permissions, complete the following tasks:
- Create a user group
- Edit a user group's details
- Invite users to the group and manage those invitations
- Delete a user group
- Remove users from a user group
- Add, edit or remove user group permissions for other users
User Groups tab elements#
Figure: User Groups tab elements

| Callout | Name | Description |
|---|---|---|
| A | User Groups tab | Click to open the User Groups tab. |
| B | Search user groups | Search user groups by name, ID, and more. You can now search using a partial name which is an easy way to filter your search. |
| C | User groups list | View the list of user groups you can access. |
| D | Three-dot menu icon | Click to access other options where you can view, edit, or delete a user group from the user groups list, depending on your permissions. You can also manage permissions and invitations in the user group. For more detailed information, refer to the sections on Managing invitations and Managing Permissions below. |
Managing invitations#
Console App 3.4 introduces new functionality for managing user invitations to a user group.
To access the invitation management features, do the following:
- On the row of the user group you are interested in, click the three-dot menu.
- When the menu opens, click Invites.
- You are then presented with the Invites dialog where a range of invitation management features are now available.
Invites dialog#
Figure: Invites dialog
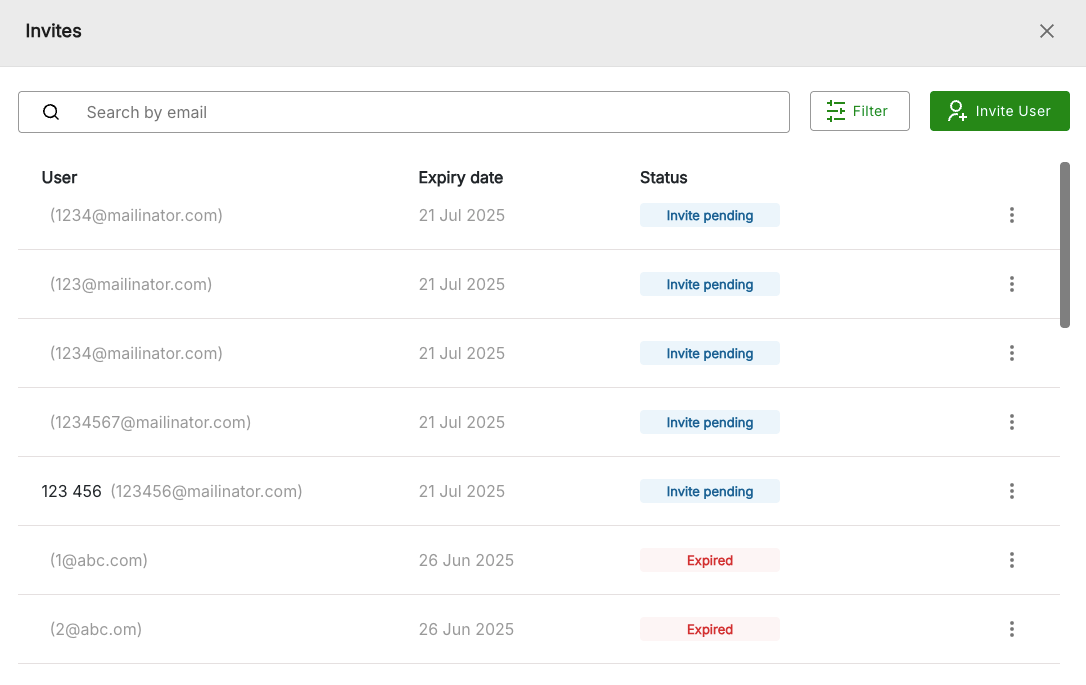
The Invites dialog lists all the invites that have been emailed for a particular user group and indicates the status of each invite.
Status column#
In the Status column for each invite, the current status will be listed and can have the following values:
- Invite pending (invitation has just been sent out, awaiting response)
- Expired (inivitation has expired as it was not responded to in time)
- Cancelled (invitation has been revoked)
- Rejected (user has rejected the invitation)
- Accepted (user has accepted the invitation)
Invite management functions#
For certain invitations, a three-dot menu option is available where you can access further invite management functions. These extra functions are only for invitations which have the following status types:
- Invite pending
- Expired
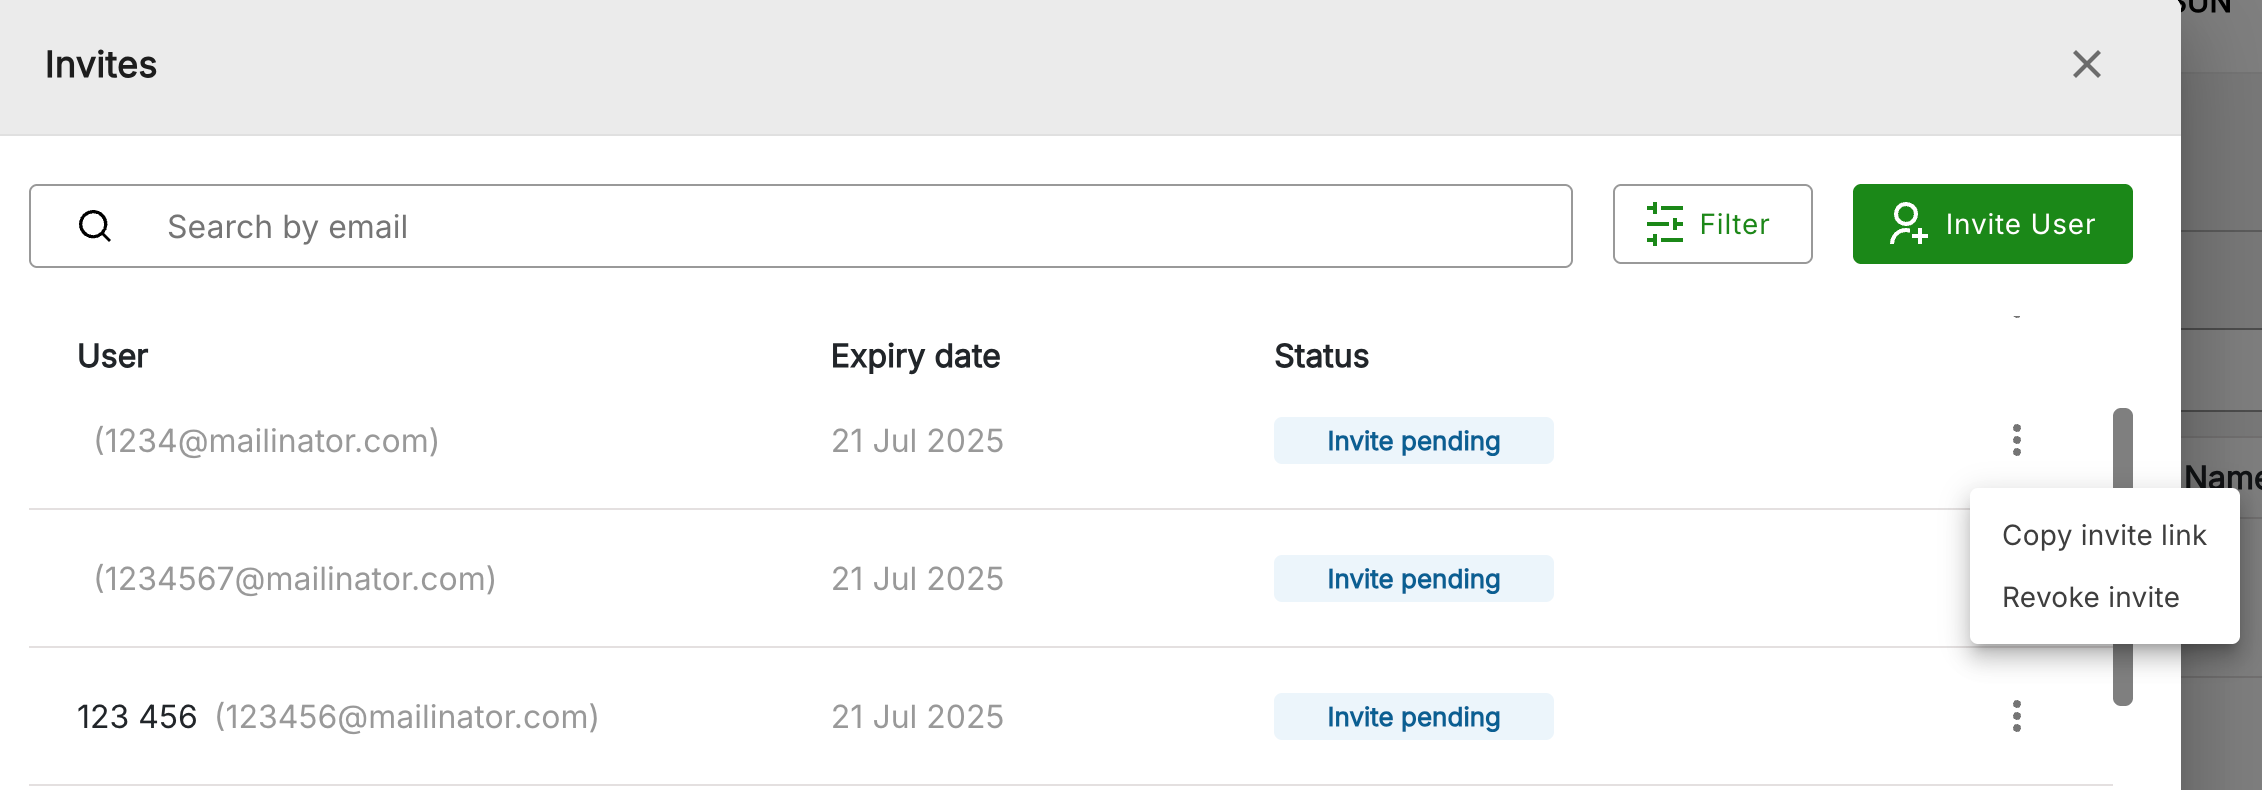
Invite management functions for Invite pending status#
For an invitation with status of Invite pending, the three-dot menu will present the following management options:
- Copy invite link
- Revoke invite
Figure: Invite pending options
Invite management functions for Expired status#
For an invitation with status of Expired, the three-dot menu will present the following management options:
- Resend invite
- Revoke invite
Figure: Expired options

Top bar actions#
Along the top bar of the Invites page are several options for performing additional actions, namely:
- Search by email
- Filter (by status type)
- Invite User
Search by email#
In the Search by email box at the top of the page, you can enter full or partial email addresses to search for particular users.
Filter#
Use the Filter button to display a filtered view of the list of users organized by status type. Available filter options are:
- All Invites
- Pending Invites
- Expired Invites
- Accepted Invites
- Cancelled Invites
- Rejected Invites
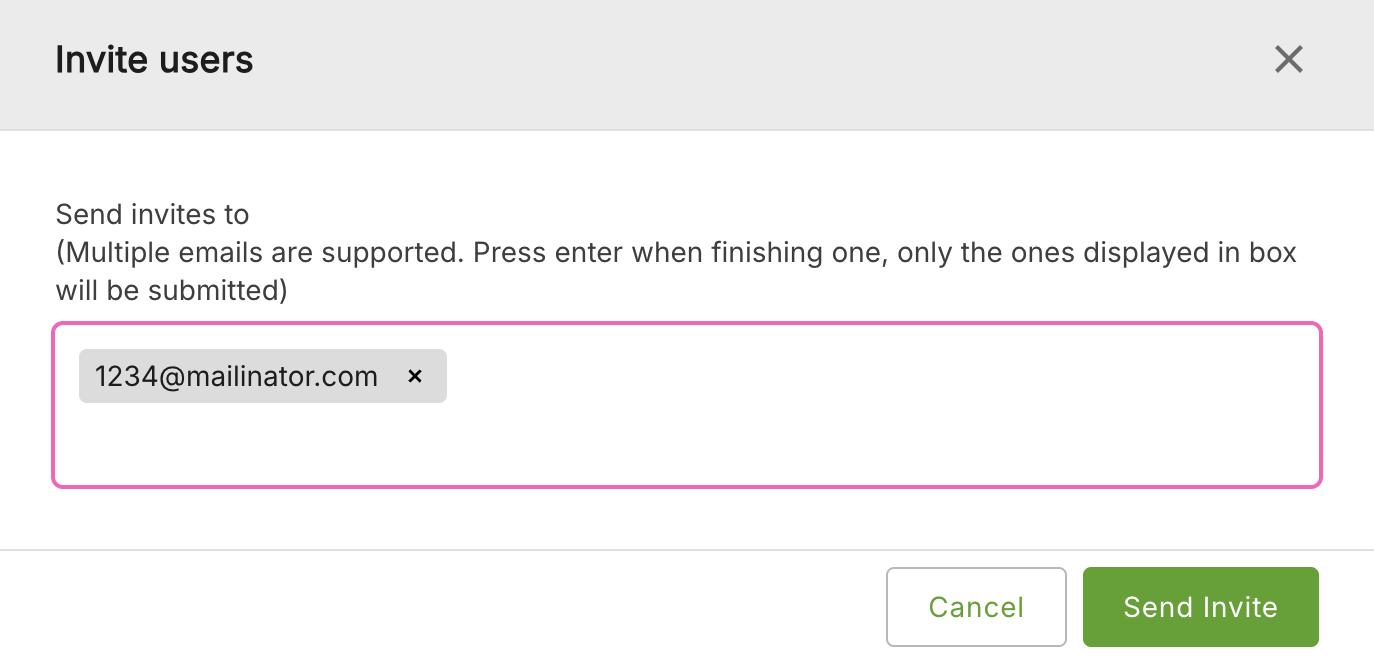
Invite User#
To invite a new user or a selection of users, do the following:
- Click the Invite User button.
- The Invite users dialog box will open and you can enter the email of a user or several users that you want to invite. Press Enter after entering each email address.
- When all emails have been entered, click the Send Invite button to email out the invitations. The new invitations will now be listed on the page, each with the status of Invite pending.
Figure: Invite users dialog
Note: For each new invitation listed, on the three-dot menu, you can now perform the actions: Copy invite link and Revoke invite.
Managing permissions#
To access the permissions management features, do the following:
- On the row of the user group you are interested in, click the three-dot menu.
- When the menu opens, click Permissions.
- You are then presented with the Permission dialog where you can view permission information.
Figure: Permissions dialog
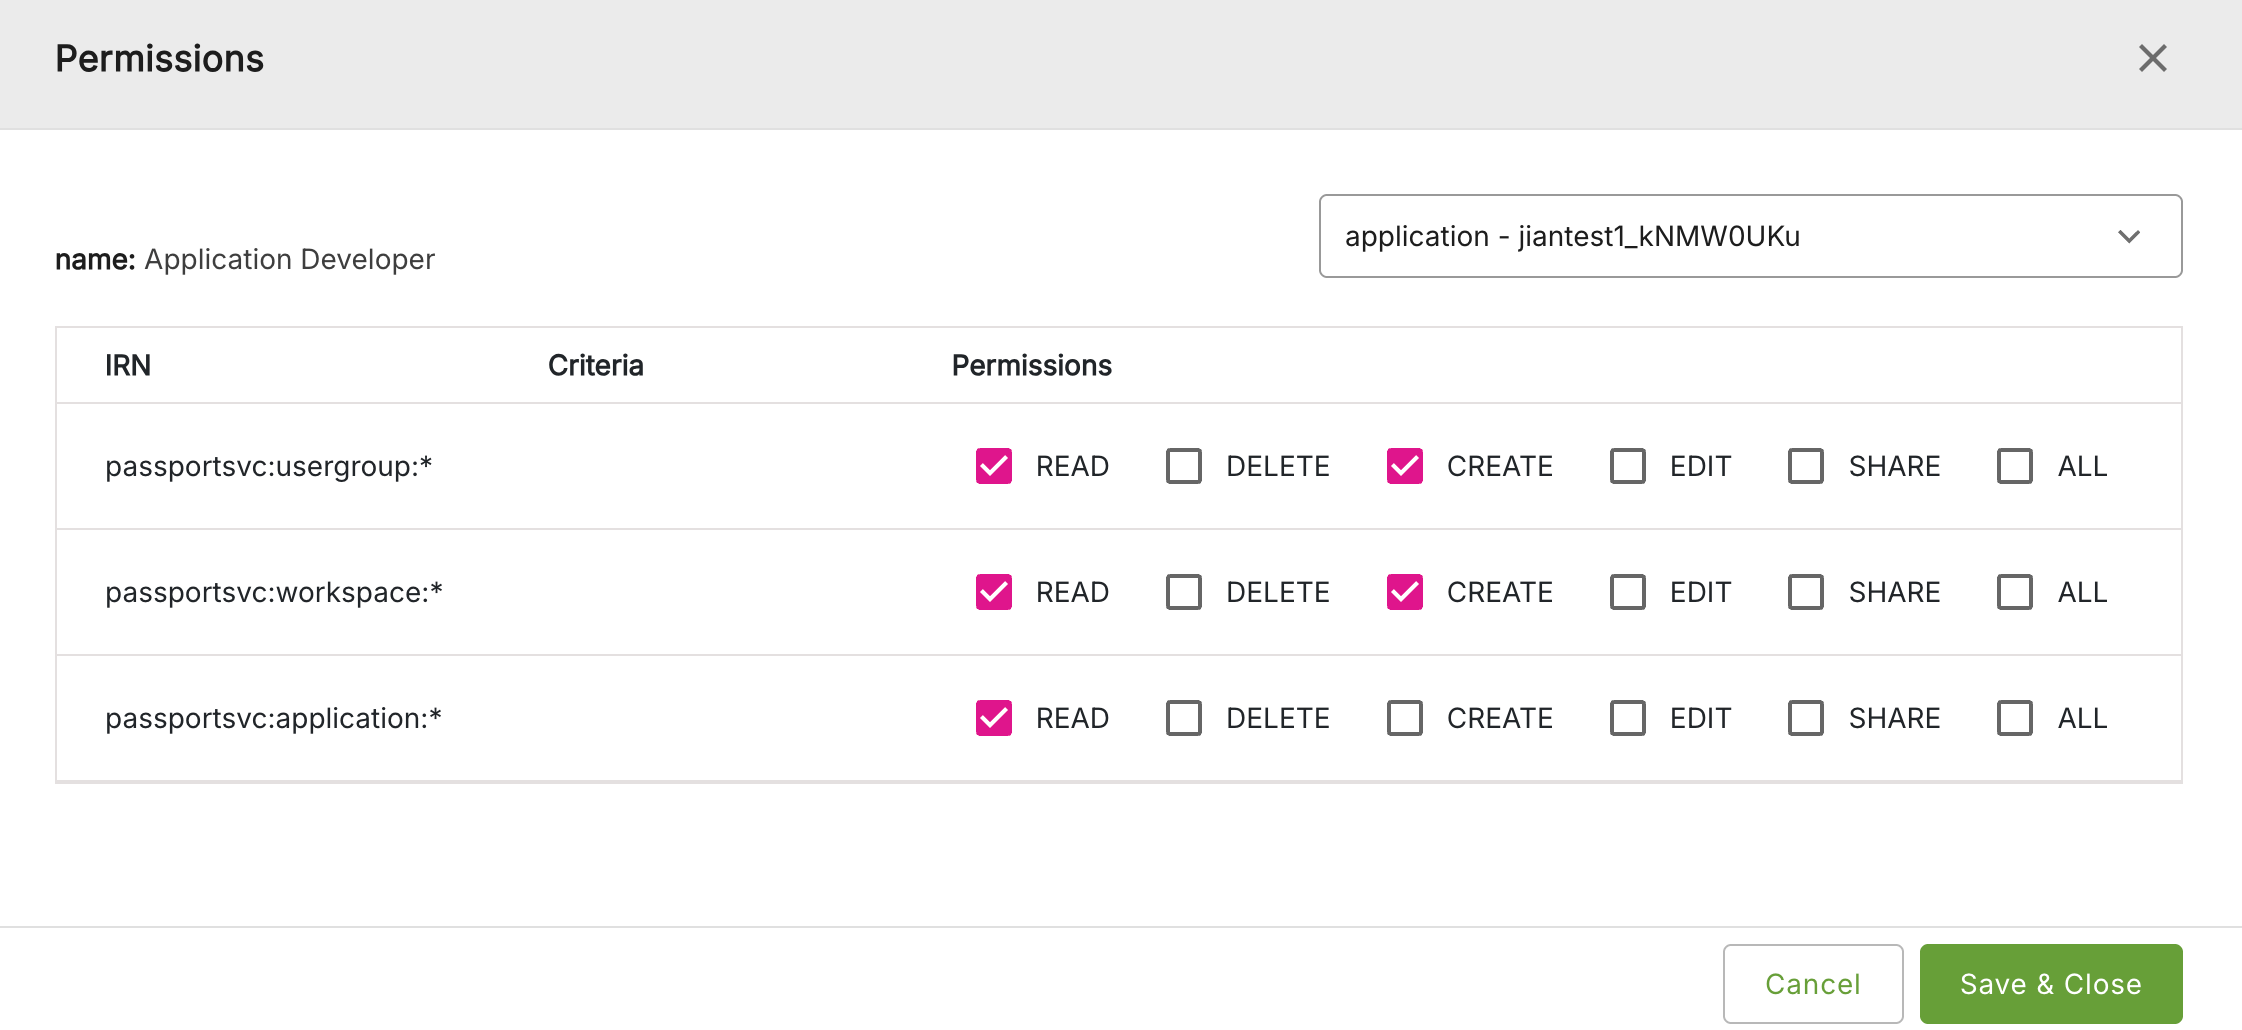
Selecting and viewing user groups#
In the top-bar of the Permissions dialog, a drop-down menu is available which allows you to view permissions for the full range of user groups to which you have access. It will also list other user groups which are linked to the selected user group for an application.
Editing permissions#
To edit the permissions displayed, do the following:
- On the Permissions dialog, select or deselect each permission as required, by clicking on the check box for each.
- When done, click Save & Close.