Scripts Editor
Overview#
The Scripts Editor option provide access to the main functions available for managing platform scripts. It is a browser-based Integrated Development Environment (IDE) which allows for the creation, validation and management of platform scripts.
The Scripts Editor menu currently has just one option: Open. Click Open to access the Scripts Editor page.
Scripts Editor page#
Use the Scripts Editor page to manage, validate, and run platform scripts from Workbench.
Scripts Editor page UI elements#
Refer to the figure below which points out the main UI elements on the Scripts Editor page. Refer to the table below for explanation of each of the elements.
Figure: Scripts Editor page UI elements
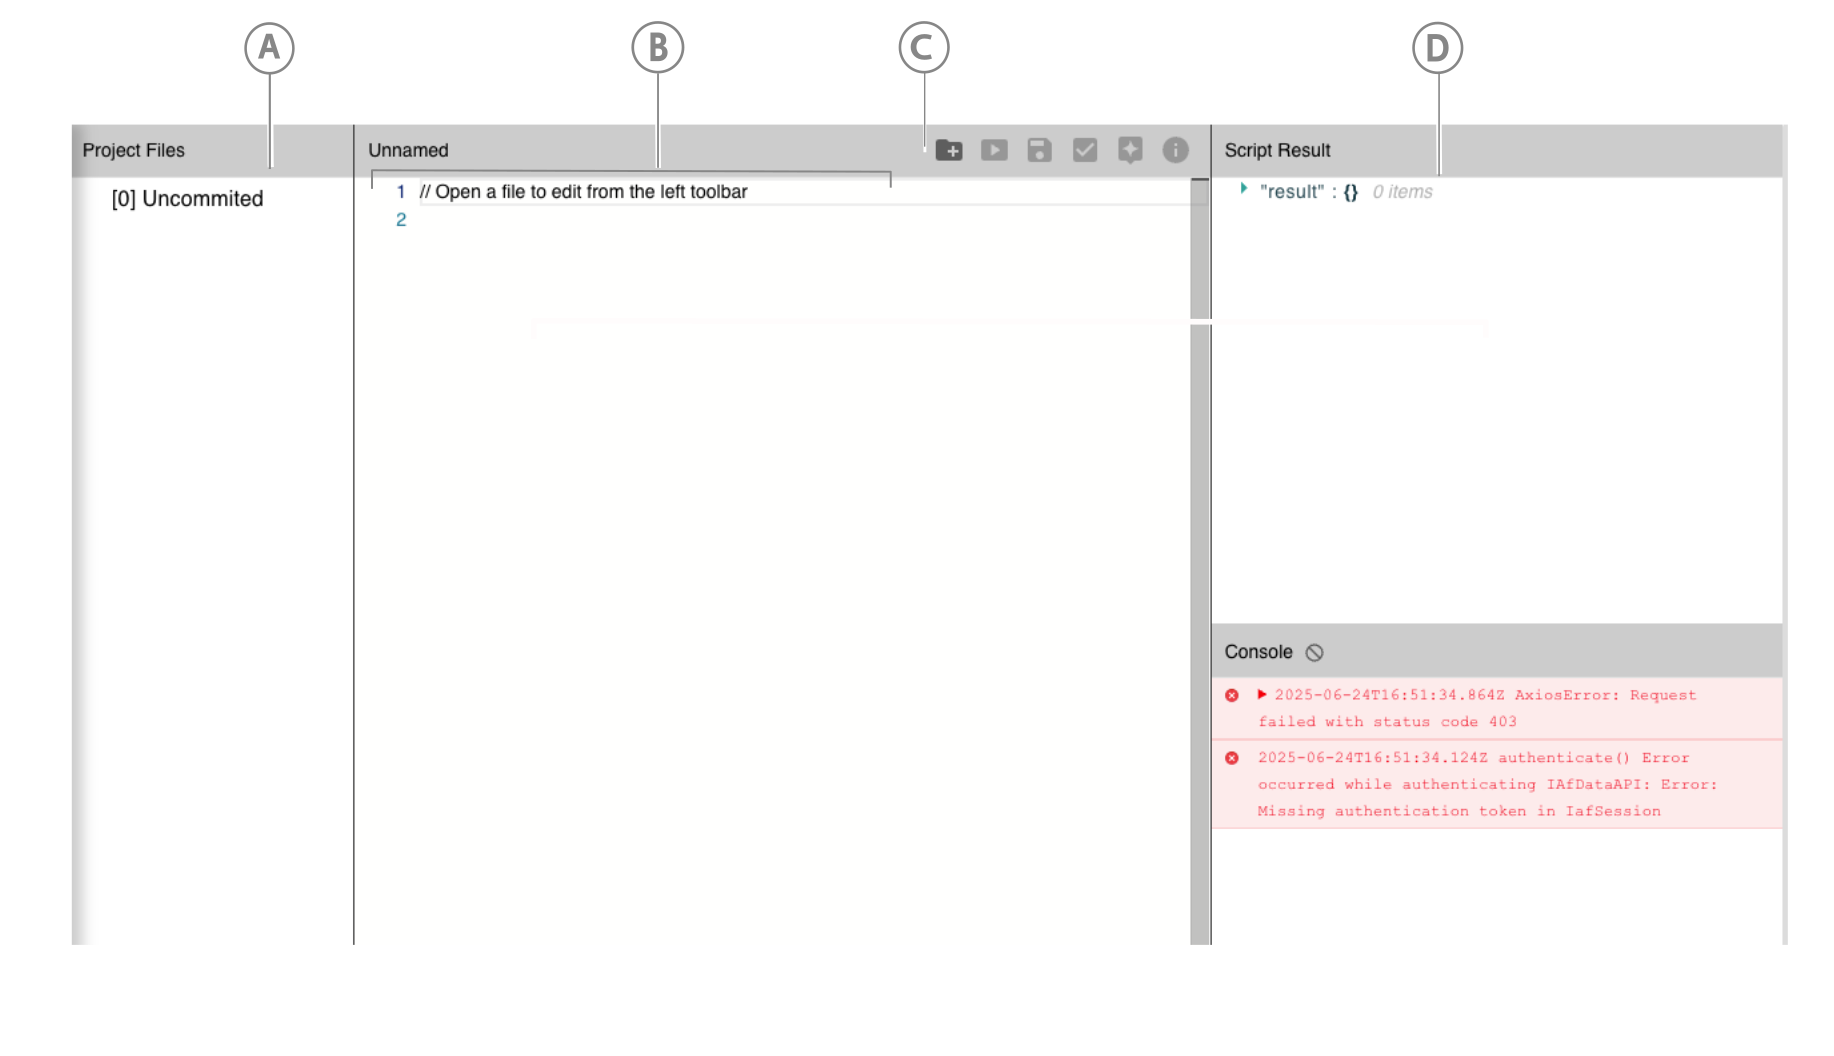
| Callout | UI element name | Description |
|---|---|---|
| A | Project Files side-bar | The left side-bar lists all files currently committed in the project as well as a selection that lists uncommitted scripts. |
| B | Script listing area | The main central area lists the current script. It opens with a blank script template. |
| C | Top menu icons | The top menu lists a series of icons for actions such as Add New File and Execute Script. See Top menu actions below for more details. |
| D | Script Result/Console side-bar | The right side-bar displays the results (in JSON) of a script execution. It also has a console area which lists details of each script execution. |
Top menu actions#
On the Scripts Editor page, there is a top menu which lists a series of icons for the various actions possible on a script. The current range of actions available are:
- Add New File: Use this icon to create a new script file. You will need to enter details of the file and it will then open a new blank script template.
- Run Script File: Use this icon to parse and execute your script. A dialog will appear which will allow you to select which function should be executed. The results are displayed in JSON in the Script Result panel.
- Save File: Use this icon to save your script and place it into the uncommitted project files.
- Commit File: Use this icon to commit the script file to the project. A dialog will appear which allows you to select which scripts should be committed and if it should be committed to the current version or a new version.
- AI Prompt: Use this icon to avail of the AI code assist feature. A dialog will appear which will prompt you to ask AI for coding assistance. The AI is trained in the Twinit Platform libraries and can assist in generating a code base on Natural Language Processing (NLP).
- Show Script Explanation: Use this icon to display a dialog which explains the code that the AI Prompt has produced.