Platform Workbench
Overview#
The Platform Workbench is a tool which allows you to quickly implement a digital twin environment on the Platform. It allows you to create a ‘bare’ instance of a digital twin and configure it to meet your requirements.
The primary Workbench interface is structured around a knowledge graph model that shows the Platform components as nodes in the knowledge graph. This is referred to as the project or application model.
When you are in edit mode, right-clicking on any of the nodes in the project model allows you to build or edit those components. Double-clicking on the nodes will expand the knowledge graph to show the contents of that component.
Figure: Workbench main page
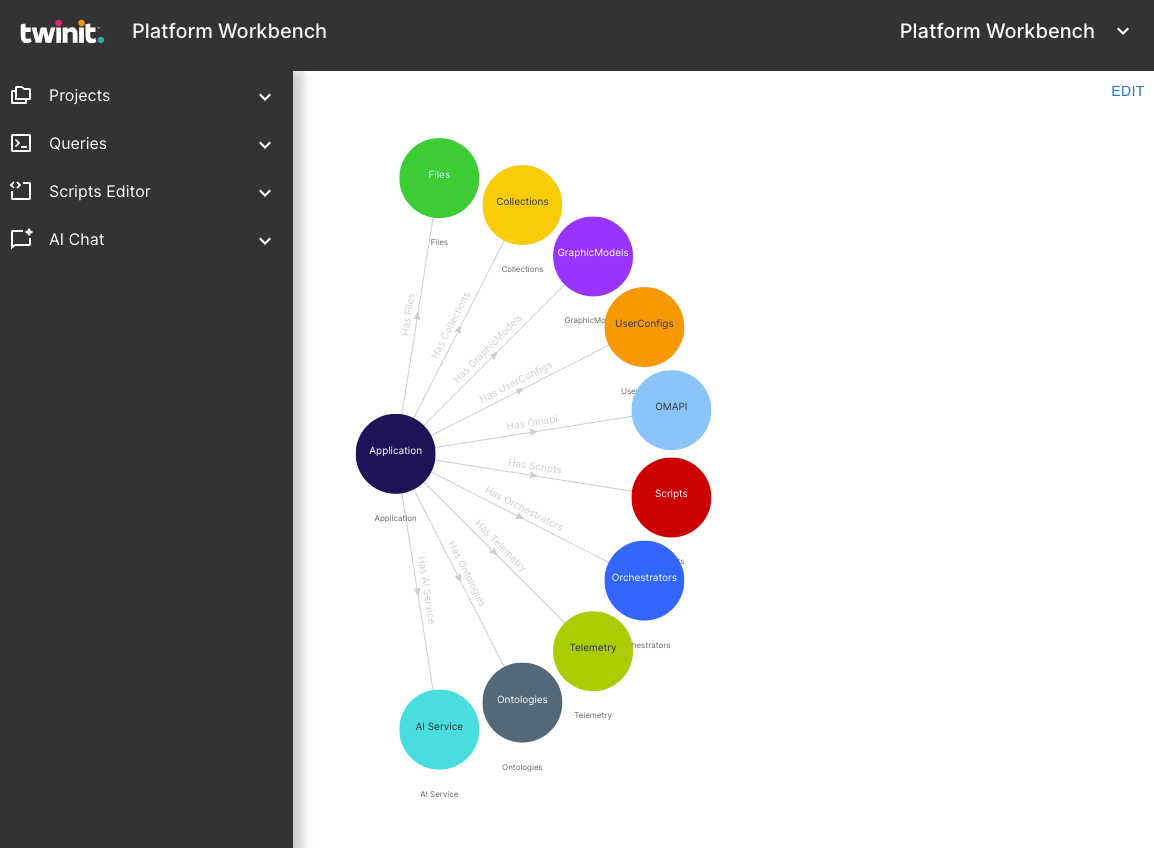
The Workbench has additional features that work in tandem with the primary interface. These options are accessed via the side-bar menu.
Main Platform Workbench menu options#
On the main Platform Workbench page, the side-bar menu options are:
- Projects - Create and manage projects
- Queries - Create and view queries
- Scripts Editor - Access the Script Editor
- AI Chat - Set up AI chat bot
Click on an option for a detailed explanation of the available functions.
Note: On the initial page for Workbench, you will be presented with the View and Switch Project dialog. Refer to Projects for more information.
Project model#
A project (or application) model is a structured representation of an application's components, behavior, and interactions. The model is used to guide the design, development, and execution of an application.
Each digital twin project model consists of a series of nodes. Each node in the project model represents a certain component, configuration, or executional aspect of the digital twin.
To see the project model, click Projects -> Model in the left side-bar menu.
Editing the Project Model#
To edit, a project model, do the following:
- Click the Edit option in the top-right of the page.
- A message should appear in the bottom right of the page: Project is exclusively locked in Edit Mode, other users cant edit it. This will lock the current project model so only you can now make changes to it.
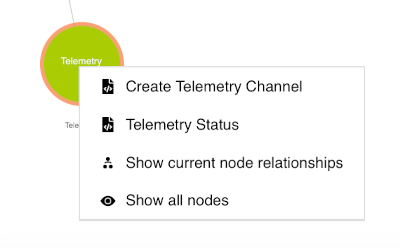
- Now if you right-click on any nodes, new edit options will appear, specific to to the functionality of each node. For example, see the extended edit options below for when you right-click on the Telemetry node.
Figure: Telemetry node - extended edit options
Project model nodes#
The different project model nodes are as follows:
- Files - allows you to upload and related files
- Collections - allows you to import data models
- GraphicsModels - allows you to import bimpk files
- UserConfigs - allows you to add and edit user configurations
- OMAPI - allows you to add and edit Object Model APIs
- Scripts - opens the script editor
- Orchestrations - allows you to add, edit, and run orchestrators
- Telemetry - allows you to create and manage telemetry channels
- Ontologies - imports and manages ontologies
- AI Service - configure and use the AI features
For a detailed explanation of editing these project model nodes, refer to Editing model nodes.