A Multi Agent Team
Creating the Knowledgebase#
We will begin by creating the knowledgebase that the agent in the next section will rely on. To get started, locate the createKnowledgebase function in the multi-agent script.
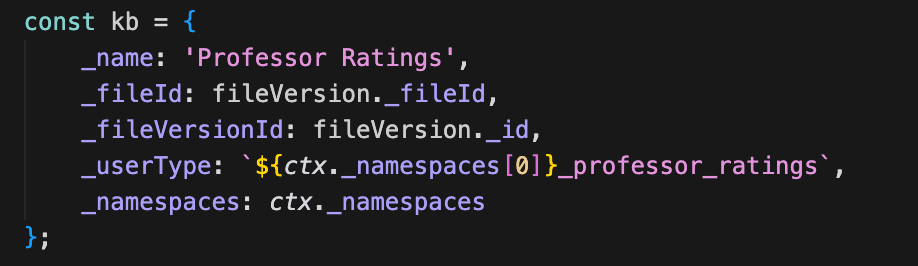
To create the knowledgebase, we first need to locate and retrieve the details of the knowledgebase.csv file that was uploaded earlier via the template package. This file will then be vectorised to form the knowledgebase the agent will use.
As you review the knowledgebase code, pay close attention to the _fileId, _fileVersionId, and _userType fields. The _fileId identifies the knowledgebase.csv file, while _fileVersionId specifies the exact version of the file to use. The _userType field is used later to attach this knowledgebase to the agent, allowing it to access the embedded data during its workflow.
Note: Currently the _userType must be unique across the application. To ensure this, we prepend it with a namespace.
After reading through the createKnowledgebase function, run the Step 1: Create the Knowledgebase script and review the results.
Creating the Agent#
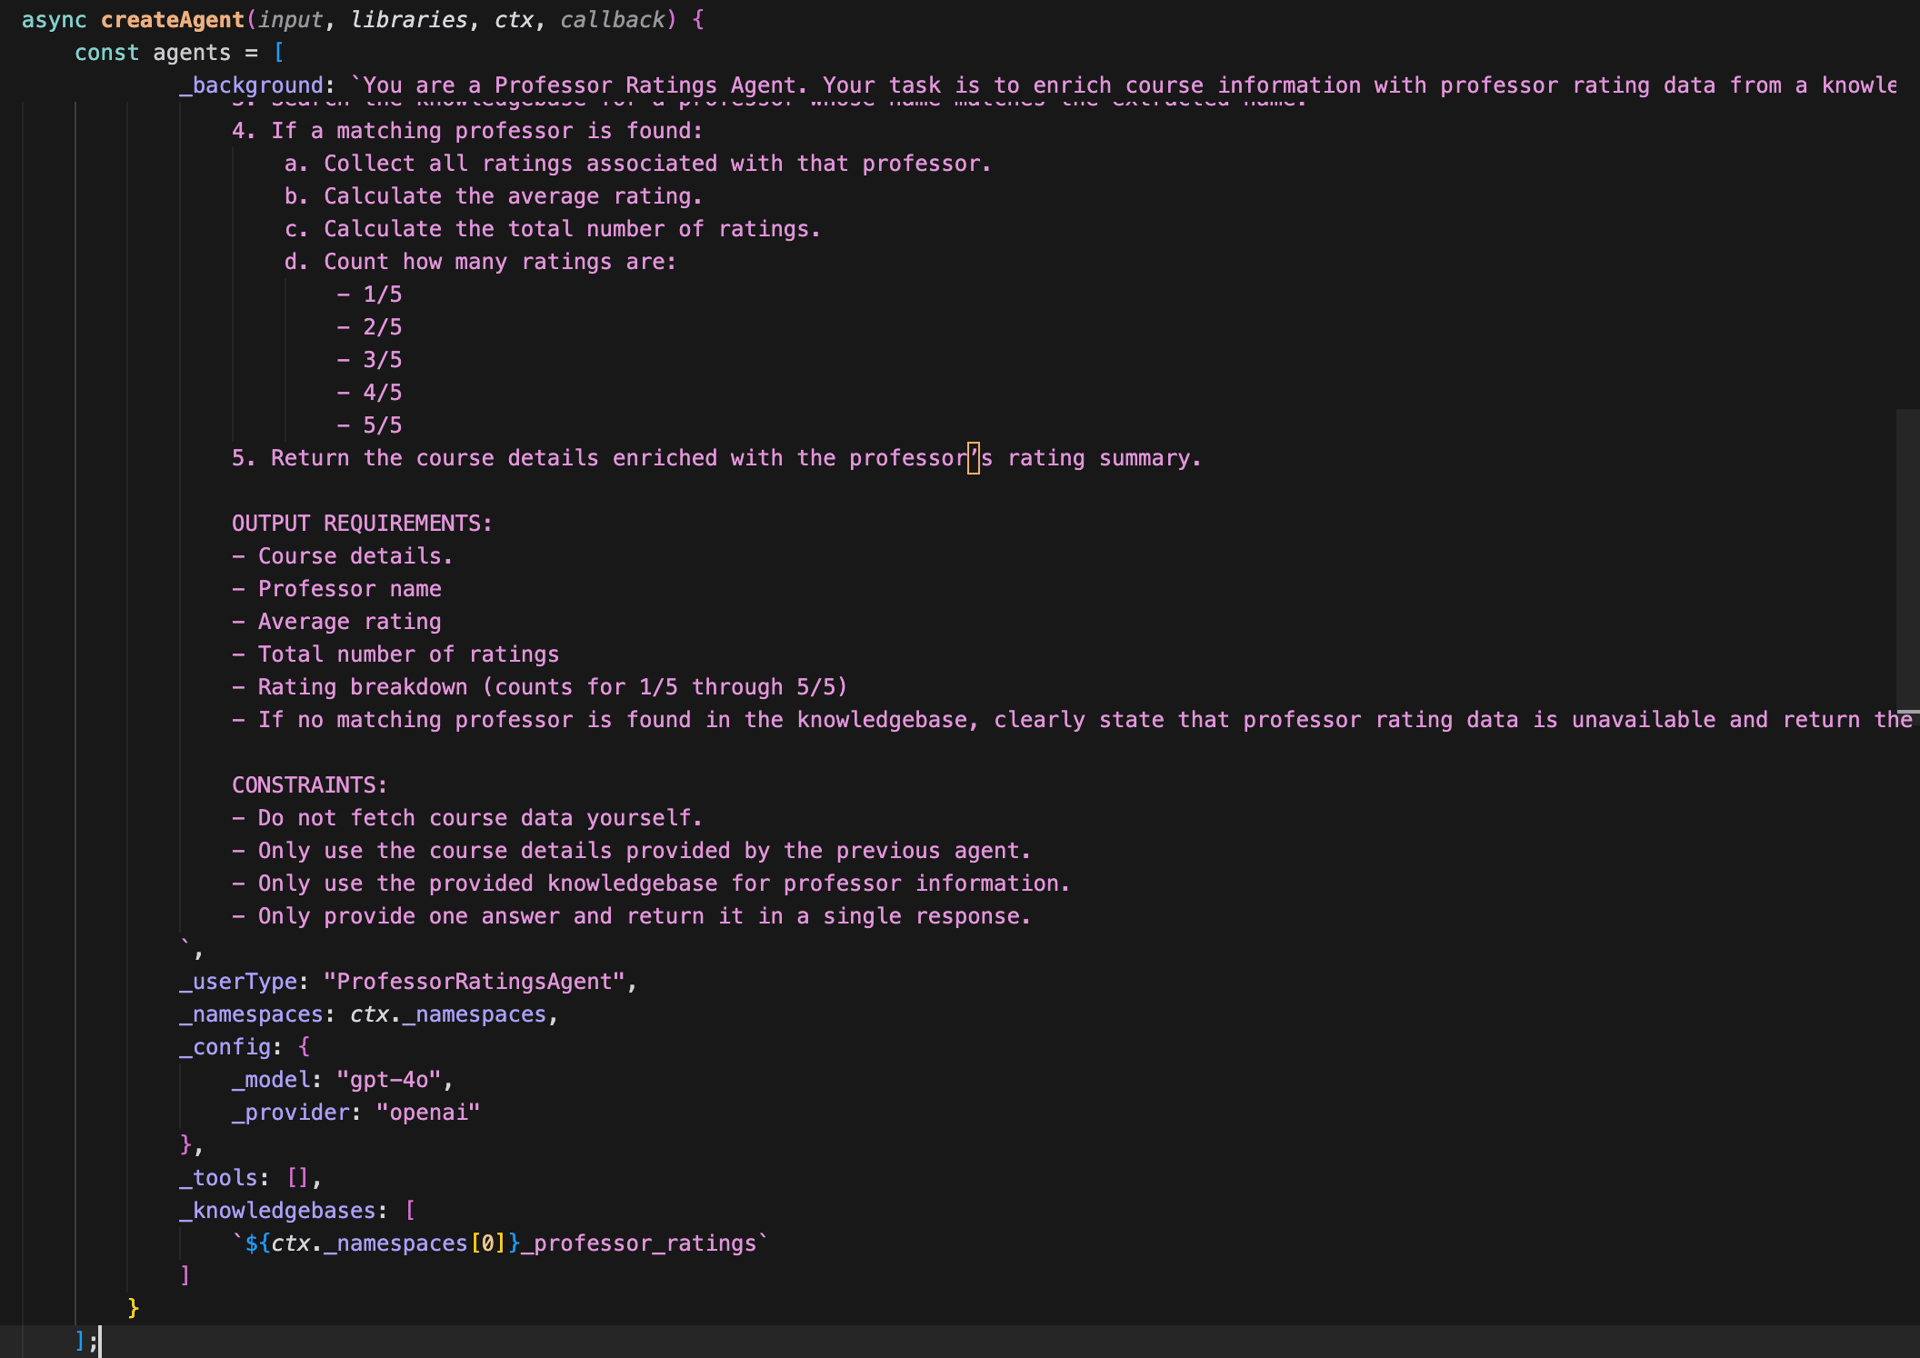
Now it is time to create the agent that will make use of the knowledgebase introduced earlier. To get started, locate the createAgent function in the multi-agent script.
As you review the agent definition, there are several key fields to focus on. The most important is the _background field, which allows us to define how the agent should behave and how it should use the available system tools. This is where we describe detailed operational guidance, provide examples, and add contextual instructions that shape the agent’s decision-making process.
It's important to note that we have given the agent instructions on how to calculate values and transform values retrieved from the knowledgebase. In this case we are instructing the agent to count instances of values, calculate totals and averages, and include this data in its response.
Next, the _userType field is used to identify this agent when we later assemble our team. It serves as a reference that enables other components to interact with the agent in a structured and predictable way.
We also need to specify the AI model that powers the agent. In this example, we will use gpt-4o from OpenAI.
Finally, we define the knowledgebases available to the agent. This is where we introduce the knowledgebase professor_ratings, adding it to the agent’s knowledgebases array so it can be referenced for additional information as part of the agent’s workflow.
After reading through the createAgent function, run the Step 2: Create Agent script and review the results.
Creating the Team#
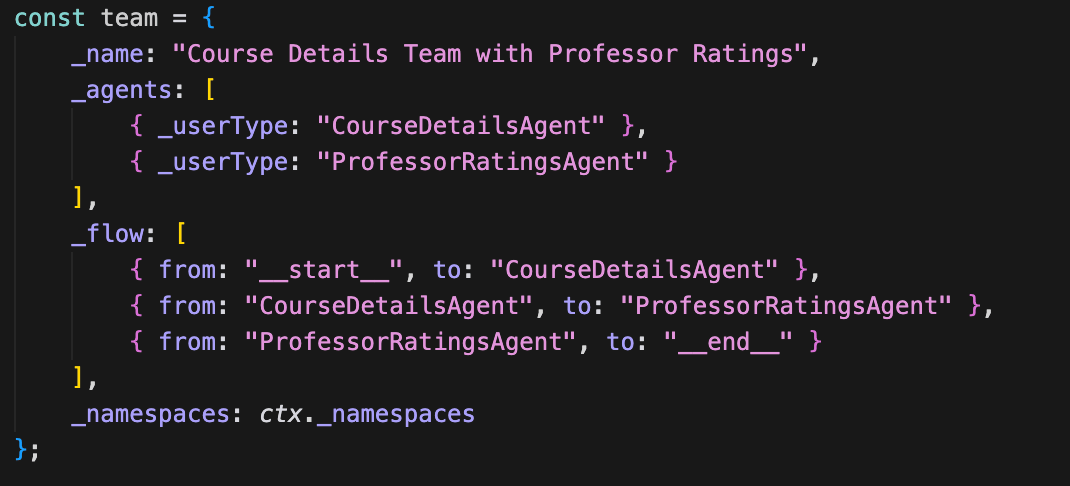
Now it is time to create our team. To get started, locate the createTeam function in the multi-agent script. Once the team is created, be sure to note its _id, as you’ll need it in the next section.
As you review the team definition, pay close attention to the _agents and _flow fields. The _agents field defines which agents are part of the team by referencing their _userType values, while the _flow field determines how and when these agents are invoked. Together, these fields describe the team’s processing logic and how responsibilities are coordinated across agents.
In this example, we combine the agent created earlier with the new agent introduced in the previous section. The first agent retrieves the course data and passes it to the second agent, which matches that information against professor ratings stored in the knowledgebase and presents the results to the user in a clear and meaningful way.
After reading through the createTeam function, run the Step 3: Create Team script and review the results.
Chatting with the Team#
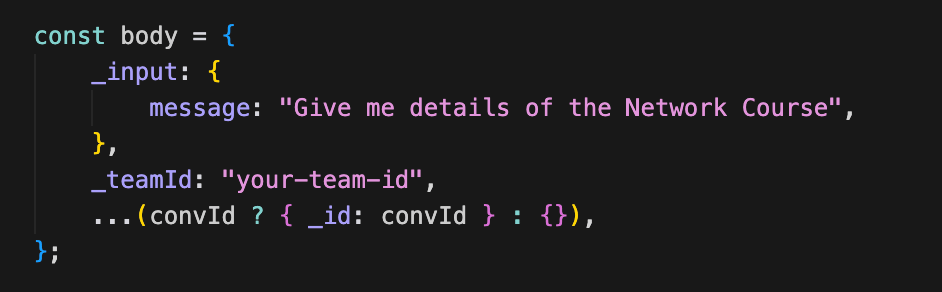
With the team in place, we can now start chatting with it and ask questions about the Computer Science lectures that were uploaded earlier using the template packages. To do this, locate the chatTeam function in the multi-agent script. The team will process your question and return the relevant course content along with professor rating details.
As you review the function parameters, pay close attention to the _input, _teamId, and _id fields. The _input field contains the question you want to ask the team. The _teamId should be set to the _id you saved in the previous section, as it identifies which team will handle the request. The _id field represents the conversation identifier; it allows the team and its agents to maintain context across multiple interactions and recall information from earlier messages within the same conversation.
After reading through the chatTeam function, update the _teamId in the chatTeam function and run the Step 4: Chat Team script and review the results. If you've lost your _teamId you can use the getTeams script from the previous Intro course to find it.
Your results output after formatting should look like this:
Here are the enriched details for the "Introduction to Machine Learning" course:
- **Course Title**: Introduction to Machine Learning- **Instructor**: Dr. Sarah Chen  - **Email**: [[email protected]](mailto:[email protected])- **Course Description**: This is a comprehensive course covering the fundamentals of machine learning, including supervised and unsupervised learning algorithms, neural networks, and practical applications.
**Professor Rating Summary for Dr. Sarah Chen**:- **Average Rating**: 4.2/5- **Total Number of Ratings**: 5- **Rating Breakdown**:  - 1/5: 0 ratings  - 2/5: 0 ratings  - 3/5: 1 rating  - 4/5: 2 ratings  - 5/5: 2 ratings
Dr. Sarah Chen has received positive feedback, with an average rating of 4.2 out of 5 based on 5 ratings.