Prepare Your Project
Create a Project
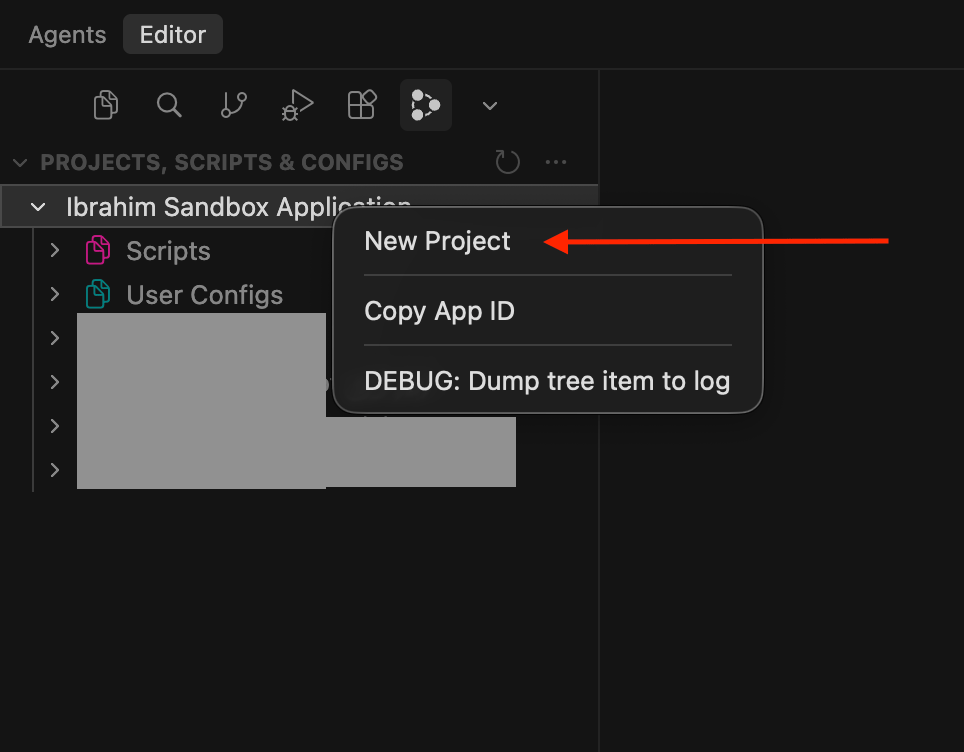
To create a new project, open the Twinit IDE, right-click on your application, and select New Project. The IDE will guide you through the project creation process, prompting you for basic information such as the project name and other required settings. Once completed, the new project will be initialised and ready for further configuration in the following steps.
Upload your OpenAI Key
To upload an OpenAI key to your project using the Twinit IDE, simply right-click your project and choose Upload AI Key. After selecting this option, an input box will appear where you can select openai and paste your OpenAI key. Once submitted, the key is securely uploaded to the appropriate location within the Passport Service Secrets. The Twinit AI Service then uses this token automatically when communicating with OpenAI services.
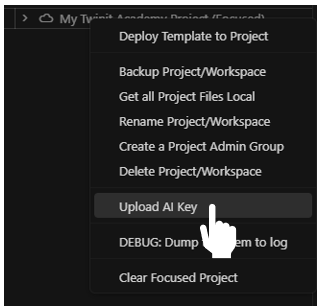
Note: The OpenAI key is not strictly required to call a Custom MCP Tool directly from an MCP client, but it is required if you later choose to equip an Agent or Team with the tool, as we do in the final lesson.
Deploy the Template Package
In this step, we will deploy the template package you downloaded earlier to your project. This template brings the newly created project up to speed by setting up all the resources you will need throughout the course.
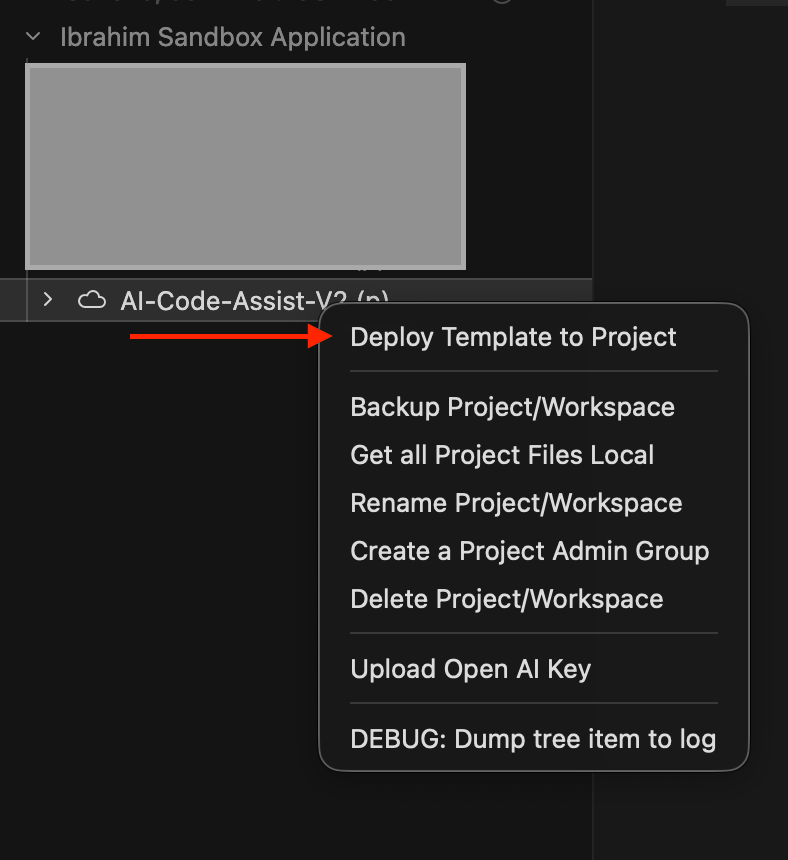
To deploy the template, locate the AI03 - Custom MCP Tools.zip file you downloaded earlier. In the Twinit IDE, right-click on your project and select Deploy Template to Project. You will be prompted to upload a ZIP file. Select AI03 - Custom MCP Tools.zip and follow the on-screen messages to track the deployment progress.
Explore the Template Contents
Using the Twinit IDE Extension, familiarise yourself with the contents of your project.
Scripts
Two backend scripts were added to your project:
- course-tools
- mcp-setup
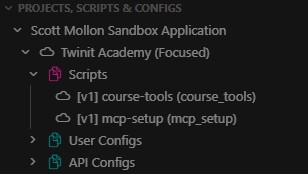
The course-tools script contains the function we will expose as a Custom MCP Tool. Open the script and review the getCourseByTitle function. Notice that it is a backend script, it accepts input, libraries, and ctx, and it uses the platform APIs from libraries to query Twinit. This is important: a Custom MCP Tool can only be backed by a backend script, not a client script that relies on imports.
The mcp-setup script contains ready-made functions that use the IafAISvc JavaScript library to create and inspect the Custom MCP Tool. You will run these functions in the Code workflow of the next lesson, so you do not have to write the setup code yourself. If you follow the IDE Extension workflow instead, you can ignore this script and use the extension's forms.
Item Service Collection
A 'Computer Science Course Collection' was created and populated with some sample Computer Science class information.

Right click on the collection in the Twinit IDE Extension and select 'Get Newest 15 Items' to see what the sample data looks like. Here's an example of one of the sample course info items:
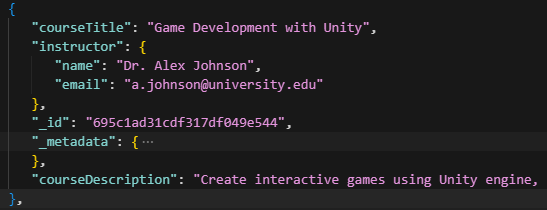
Notice it contains a course title, a course description, and information about the instructor. Our Custom MCP Tool will let an AI client look up these courses by title.