Expose and Use the Tool
Now that the GetCourseByTitle Custom MCP Tool exists, we will expose it through the AI Service MCP endpoint and call it from an MCP client. In this lesson we will use Cursor as the MCP client, but the same approach works for any MCP-compatible client such as Claude Desktop or GitHub Copilot.
The AI Service acts as an MCP server. It exposes a streamable HTTP endpoint, and MCP clients connect to it using an API key issued by the Passport Service. Once connected, the client can discover your tools, including GetCourseByTitle, and call them during a conversation.
Choose your preferred workflow below.
- Continue using Code
- Continue using IDE Extension
Generate an API Key
Connecting an MCP client to the AI Service requires an API key for your namespace, issued by the Passport Service. The client sends this key on every request using an Authorization header. The key is supplied as Basic base64(apiKey:secretKey).
Record your API key and secret for use in the configuration below.
Build the MCP Server Configuration
MCP clients are configured with a small JSON snippet that tells them where the server is and how to authenticate. The AI Service exposes its MCP server at this URL:
https://<your-api-host>/aisvc/api/v1/stateless/mcp/tools?nsfilter=<YOUR_NS>
The nsfilter query parameter selects the namespace whose tools should be exposed. Below is an example configuration for Cursor (the format is shared with GitHub Copilot):
{
  "servers": {
    "twinit": {
      "url": "https://<your-api-host>/aisvc/api/v1/stateless/mcp/tools?nsfilter=<YOUR_NS>",
      "type": "http",
      "headers": {
        "Authorization": "Basic base64(apiKey:secretKey)"
      }
    }
  },
  "inputs": []
}
For Claude Desktop, the configuration uses mcp-remote to connect to the same endpoint:
{
  "mcpServers": {
    "twinit": {
      "type": "http",
      "command": "npx",
      "args": [
        "-y",
        "mcp-remote@latest",
        "--header",
        "Authorization: Basic base64(apiKey:secretKey)",
        "--header",
        "mcp-protocol-version: 2025-06-18",
        "https://<your-api-host>/aisvc/api/v1/stateless/mcp/tools?nsfilter=<YOUR_NS>"
      ],
      "env": {}
    }
  }
}
Optionally Scope the Tools with a Filter
By default the endpoint exposes all of the tools in the namespace, including the platform's System MCP Tools. If you would rather expose only a curated set, create an MCP Tool Filter and reference it with the filter query parameter.
The mcp-setup script includes a createToolFilter function that uses IafAISvc.createMcpToolFilters to save a filter limiting visibility to your custom (user) MCP tools.
async function createToolFilter(input, libraries, ctx, callback) {
  const { PlatformApi } = libraries;
  const { IafAISvc } = PlatformApi;

  const filters = [
    {
      _namespaces: ctx.project._namespaces,
      _name: "course-tools-only",
      _description: "Limits tool visibility to the custom course MCP tools.",
      _userType: "course_tools_filter",
      _criteria: {
        _type: "user_mcp_tool"
      }
    }
  ];

  return await IafAISvc.createMcpToolFilters(filters, ctx);
}
Run the createToolFilter function, then reference the filter by its _userType from the server URL:
https://<your-api-host>/aisvc/api/v1/stateless/mcp/tools?nsfilter=<YOUR_NS>&filter=course_tools_filter
Connect and Call the Tool
Add the server configuration to Cursor's MCP settings, then start a conversation in Cursor and ask a question that the tool can answer:
Use the twinit tools to find the course "Introduction to Machine Learning". Who teaches it?
Cursor will discover the GetCourseByTitle tool, call it with { "title": "Introduction to Machine Learning" }, and use the returned course data to answer, naming the instructor and summarising the course description.
Configure MCP from the IDE Extension
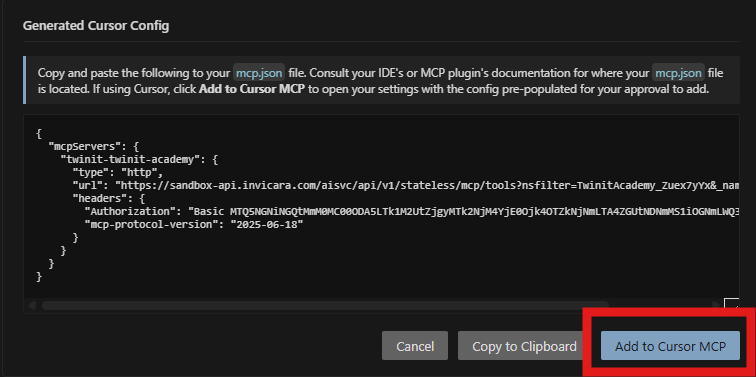
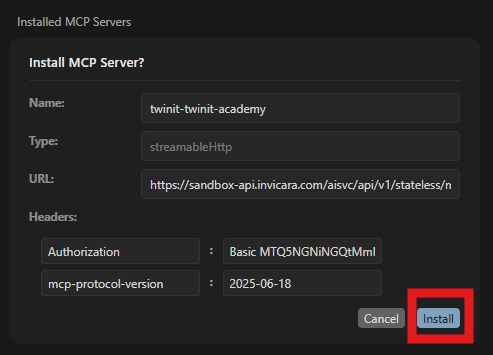
The Twinit IDE Extension can generate the API keys and the MCP server configuration for you, and, if you are using Cursor, install it automatically.
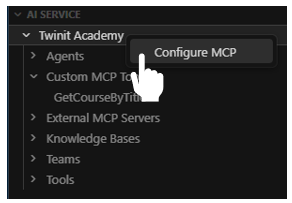
- In the AI Service panel, right click on your project and select Configure MCP
-
The Configure MCP form guides you through:
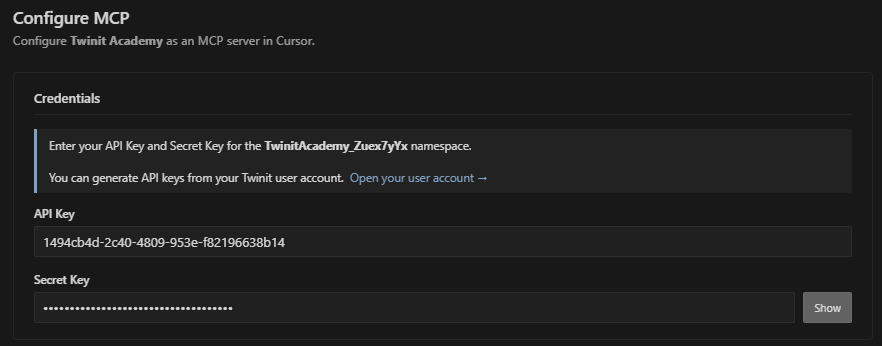
- Generating your MCP API keys for the namespace
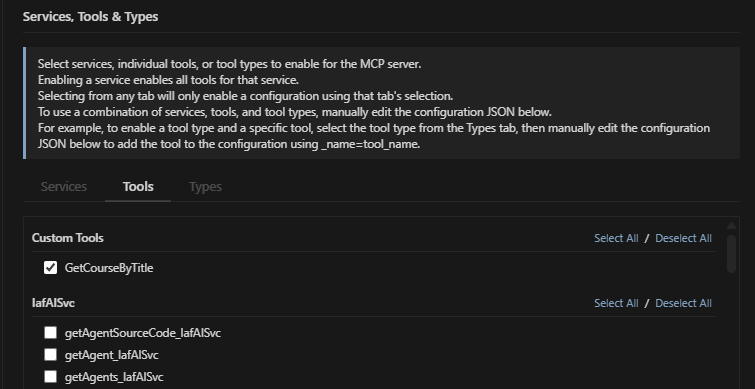
- Selecting the MCP tools in the workspace to expose, be sure to select Tools > Custom Tools > GetCourseByTitle
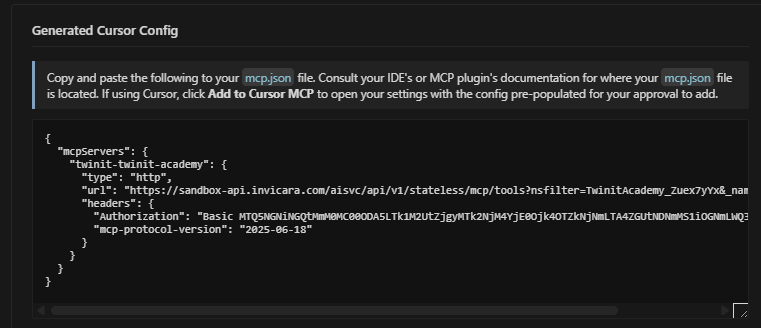
- Generating the JSON MCP servers config
- Generating your MCP API keys for the namespace
-
If you are using Cursor, the configuration can be brought over to the Cursor settings and installed automatically. Otherwise, copy the generated JSON into your MCP client's configuration.
If you do not see your tool, you may need to restart your MCP Server Connection or your IDE after creating the tool.
Call the Tool from Cursor
Once the configuration is installed, open Cursor and start a conversation that uses the tool:
Use the twinit tools to find the course "Introduction to Machine Learning". Who teaches it?
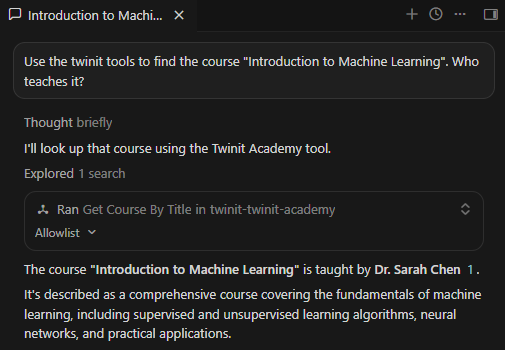
Cursor will discover the GetCourseByTitle tool, call it with the course title, and answer using the data returned from your Twinit project, naming the instructor and summarising the course description.
You have now created a Custom MCP Tool, exposed it through the AI Service MCP server, and called it from an external MCP client, all backed by your own Twinit data.