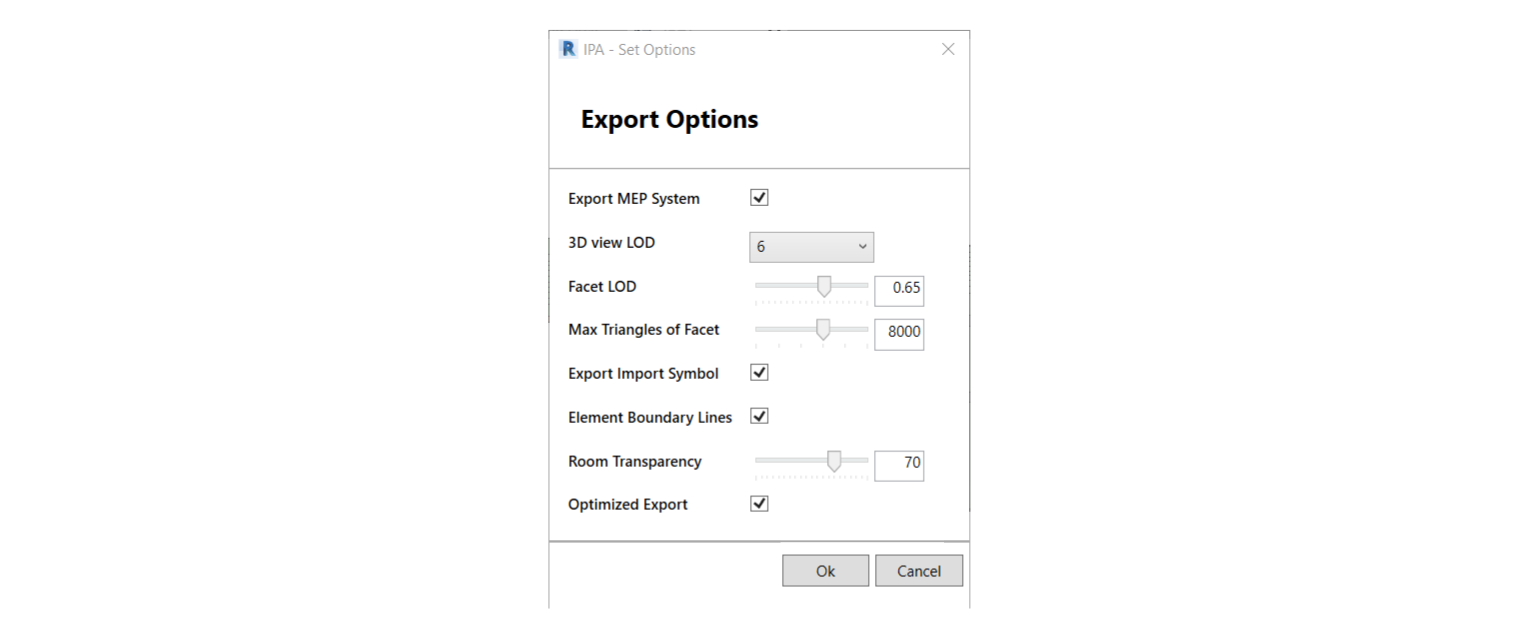
Export options dialog box
To set your export options, as you export your model, when you click Upload, the Setting Export Options dialog box appears.
Note: Any changes you make to the export options does not persist and is only valid for the current session. If you re-launch the Revit app, the export options return to their default values.
Figure: Export Option dialog box
| Option | Description | Value range | Default value |
|---|---|---|---|
| Export MEP System | Output MEP System data, System-Equipment relationship, and System-connection relationship. | Enabled or disabled | Enabled |
| 3D View LOD | Adjust the view’s Level of Detail value. A higher value results in a higher tessellation level, increasing the ammount of triangles in an element’s mesh data. | 1 to 10 | 6 |
| Facet LOD | Adjust Level of Detail value for non-plain face tessellation. A higher value results in a higher tessellation level, which determines the ammount of triangles in an element’s mesh data. | 0.1 to 1.0 | 0.65 |
| Max Triangles of Facet | Set the upper limit of triangle numbers for face tessellation. | 5000 to 10000 | 8000 |
| Export Import Symbol | Export the Import Symbol. | Enabled or disabled | Enabled |
| Element Boundary Lines | Enable or disable output element boundary lines. To not export element boundary lines, set Element Boundary Lines to false. | true or false | true |
| Optimized Export | Enable to export your model with the latest performance improvement features. For more information, see Model composition for the IafViewer Some projects might not be suitable for the latest export features - if not, you can disable this option. | Enabled or disabled | Enabled |