View level detail
Overview#
Revit views have a detail level setting that controls the level of detail that elements have when displayed in the view.
There are three levels of detail:
- Coarse
- Medium
- Fine
The view's Detail Level setting impacts the element geometry that is exported to the bimpk format.
Guidelines for exporting#
Before you export to bimpk, set your view's Detail Level based on your requirements:
- Fine: For best results, set the detail level to Fine. This means that all elements export as a solid but loading time may take longer.
- Medium: Loads faster than Fine models. If you export with Medium level of detail, smaller elements such as pipes and pipe fittings appear as line geometry rather than solid. If you want such elements to appear in the digital twin, select a Fine detail level.
Examples of detail levels#
Custom door examples#
The following graphic demonstrates the three detail levels for a custom door:
Figure: Level of detail door example
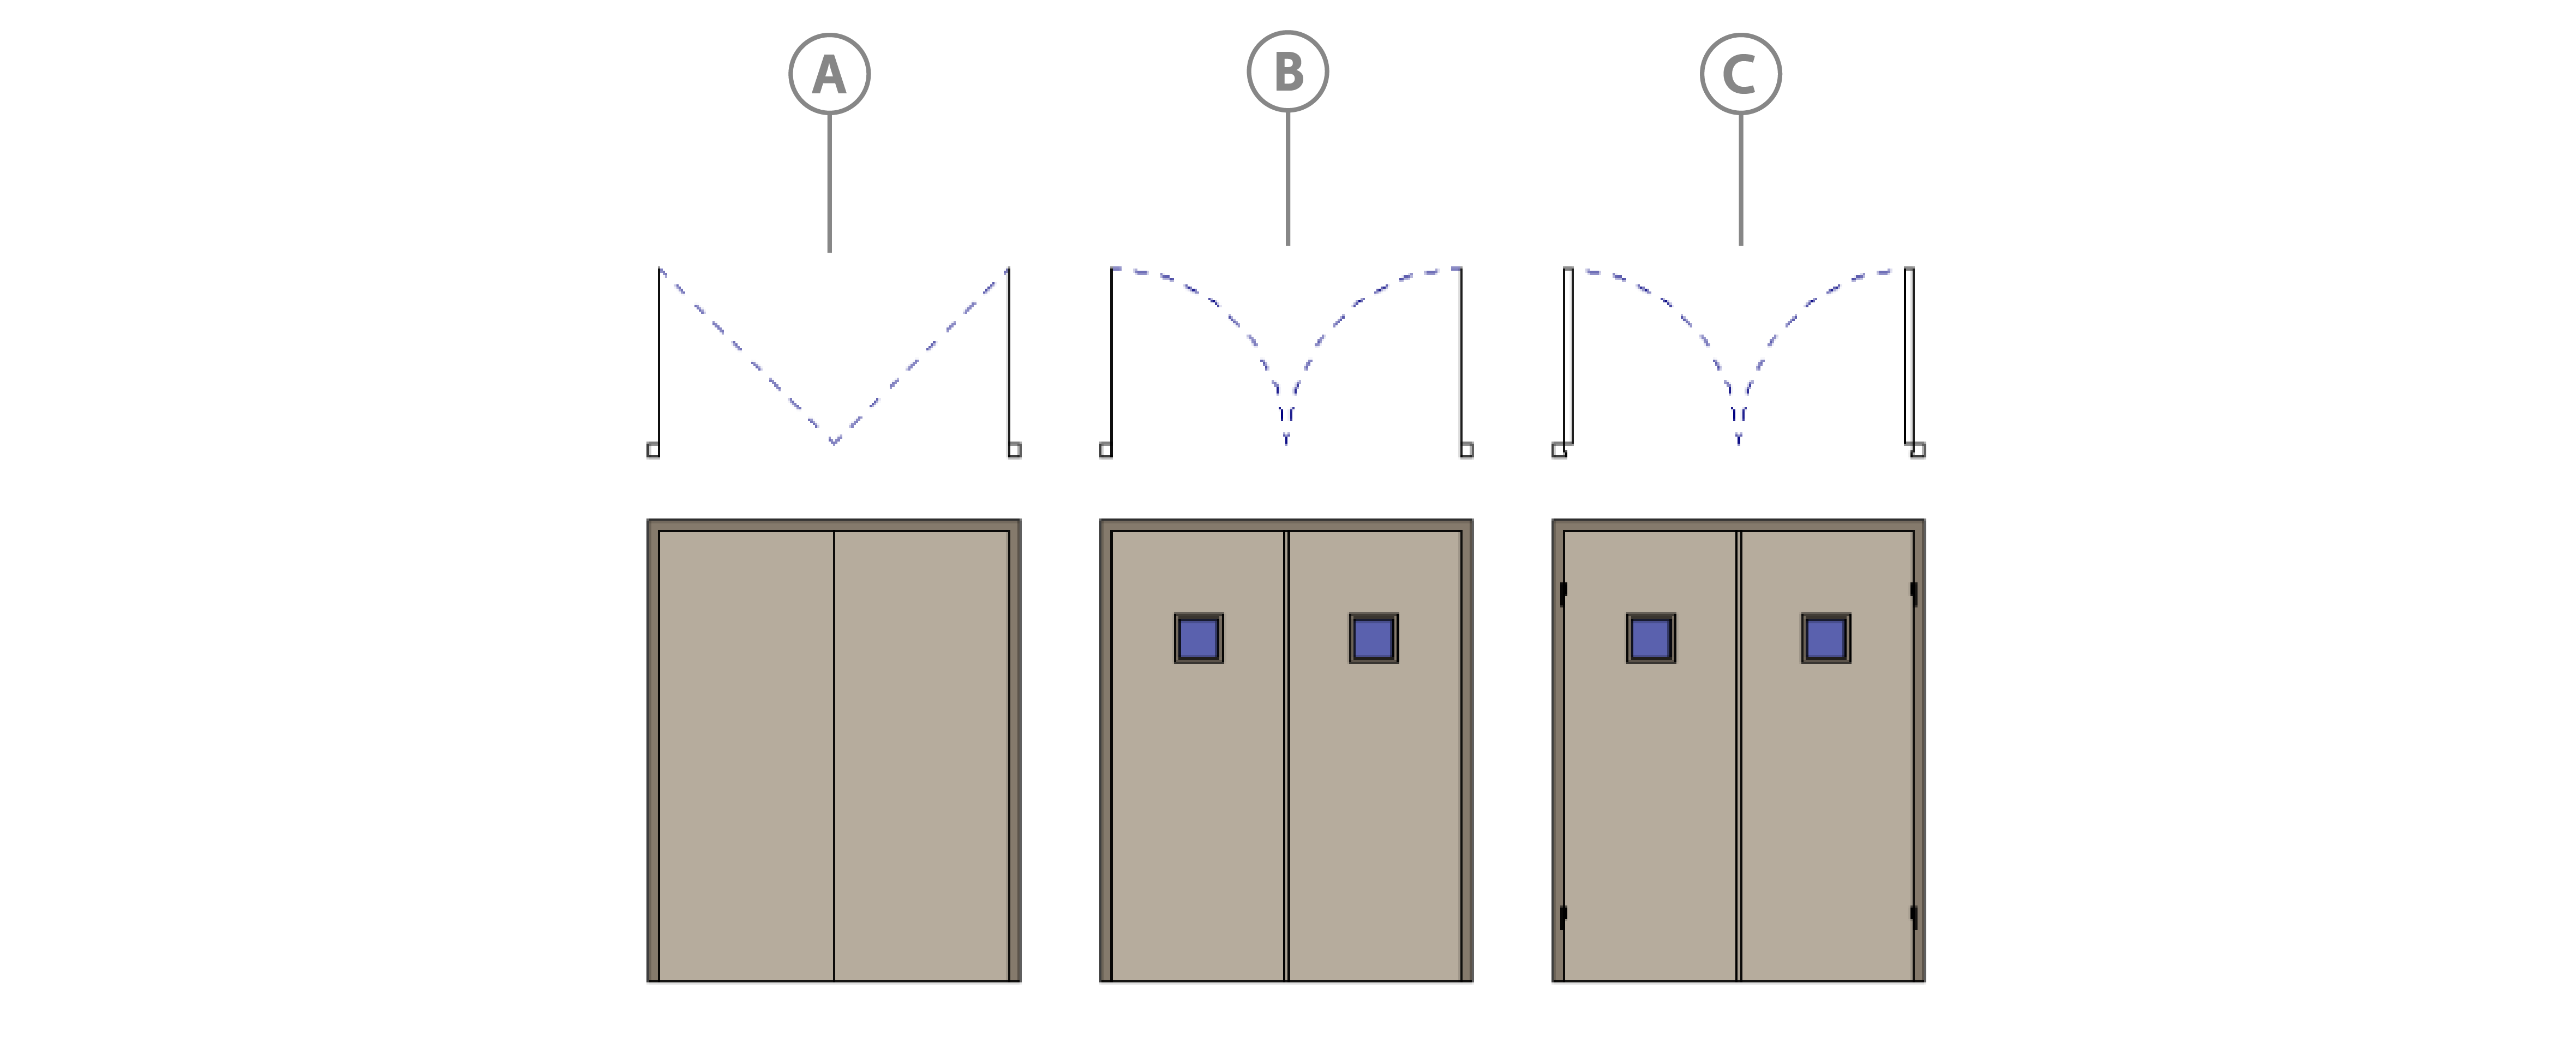
| Callout | Level of detail |
|---|---|
| A | Coarse |
| B | Medium |
| C | Fine |
Pipe examples#
The following graphic demonstrates the Medium and Fine detail levels for pipes and pipe fittings. For the Medium level, they appear as Line geometry, and for the Fine level, they appear as solid geometry:
Figure: Level of detail pipe and pipe fitting example
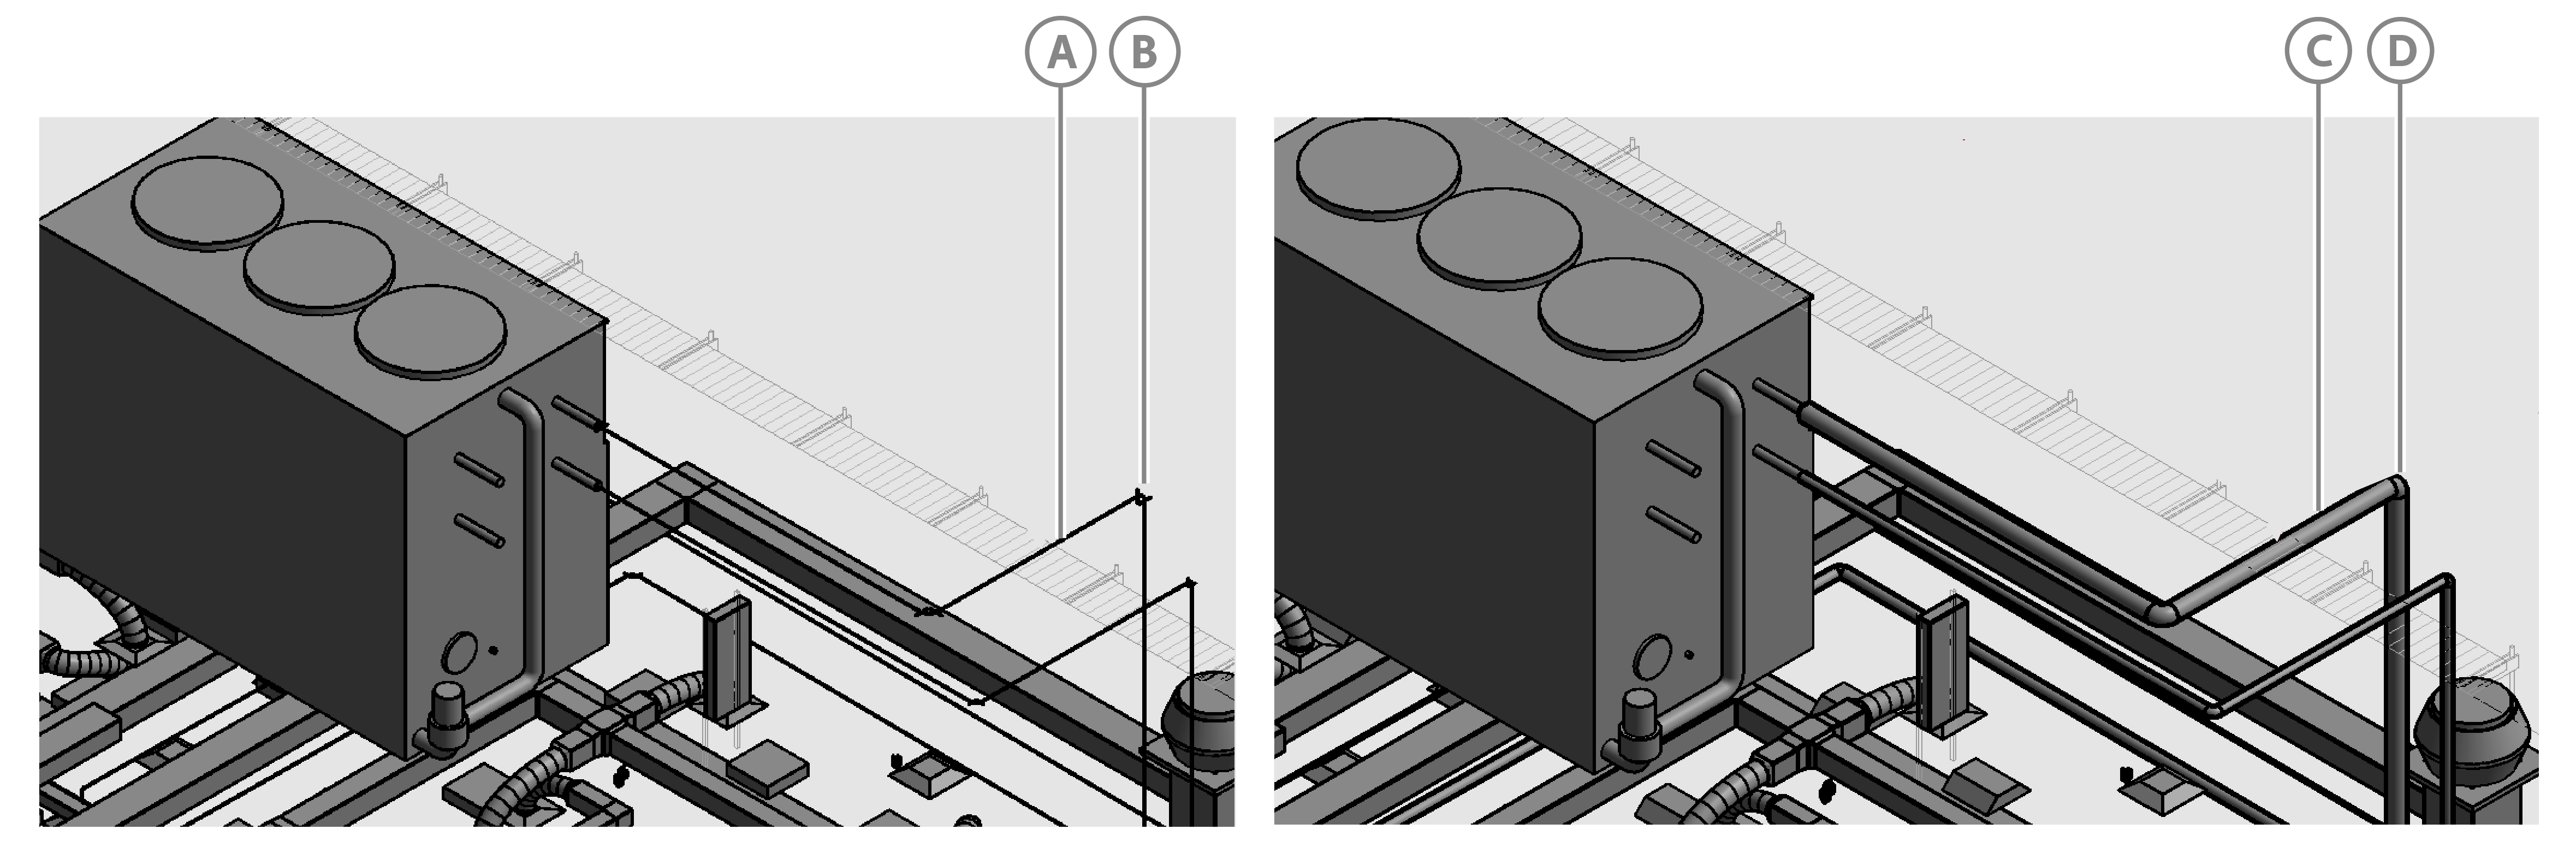
| Callout | Level of detail | Entity | Appears as |
|---|---|---|---|
| A | Medium | Pipe | Line geometry |
| B | Medium | Pipe fitting | Line geometry |
| C | Fine | Pipe | Solid geometry |
| D | Fine | Pipe fitting | Solid geometry |