Editing model nodes
Overview#
A range of edit options are available for changing the properties of a project model's nodes. To edit these properties, you must first lock the project model for editing.
To edit, a project model, do the following:
- Click the Edit option in the top-right of the page.
- A message should appear in the bottom right of the page: Project is exclusively locked in Edit Mode, other users cant edit it. This will lock the current project model so only you can now make changes to it.
- Now if you right-click on any nodes, new edit options will appear, specific to to the functionality of each node.
This page describes each of the project nodes and the extended edit options available for each.
List of model nodes#
The different project model nodes available are:
- Files node - upload files
- Collections node - import data models
- GraphicsModels node - import BIMPK and other graphics files
- UserConfigs node - add and edit user configurations
- OMAPI node - add and edit Object Model APIs
- Scripts nodes - add new scripts
- Orchestrators node - add, edit, and run orchestrators
- Telemetry node - create and manage telemetry channels
- Ontologies node - import, view, and manage ontologies
Click on a node listing to get a detailed explanation of the edit options available or refer to the sections below.
Note: All nodes feature a set of edit options specific to that node, and the following two options which are common to all nodes:
- Show current node relationships (expand the knowledge graph to show all node connections)
- Show all nodes (expand the knowledge graph to reveal all nodes present)
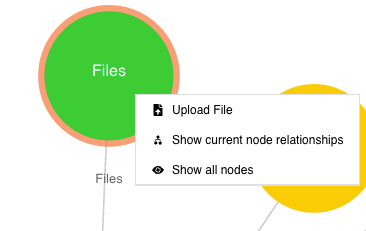
Files node#
Use the Files node to upload files. Right-click on the Files node to access these extended edit options:
- Upload File
- Show current node relationships
- Show all nodes
Figure: Files node - extended edit options
Uploading files#
To use the Files node to upload a file, do the following:
- In edit mode, right-click the Files node.
- Click the option Upload File.
- The Upload File dialog will open. Add files by dragging and dropping files into the file upload area of the dialog. Alternatively, click Choose Files to manually add files.
- If required, click the Create New File Container button to define new file formats.
- When done, click Upload to complete the process of file uploading.
Figure: Files node - Upload File dialog

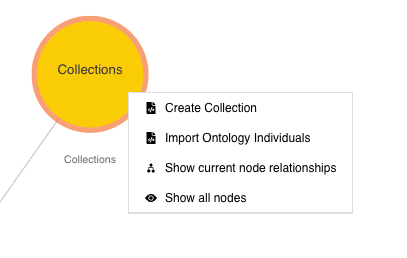
Collections node#
Use the Collections node to import data models. Right-click on the Collections node to access these extended edit options:
- Create Collection
- Import Ontology Individuals
- Show current node relationships
- Show all nodes
Figure: Collections node - extended edit options
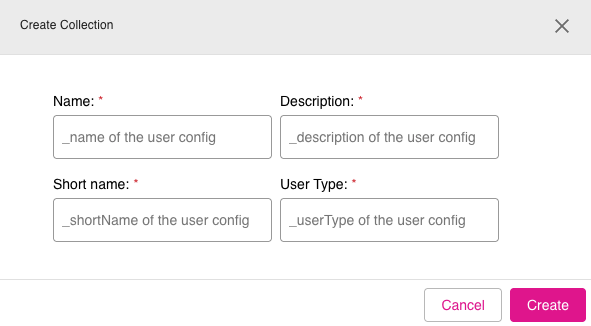
Creating a new collection#
To use the Collections node to create a new collection, do the following:
- In edit mode, right-click the Collections node.
- Click the option Create Collection.
- The Create Collection dialog appears. Fill in the information for the fields: Name, Description, Short name, and User Type.
- Click Create to create the new collection.
Figure: Collections node - Create Collection dialog
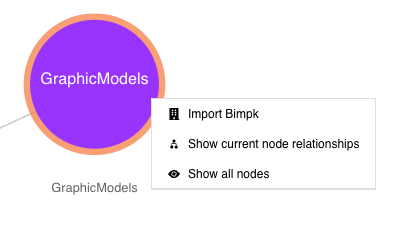
GraphicsModels node#
Use the GraphicsModels node to import BIMPK and SGPK files. Right-click on the GraphicsModels node to access these extended edit options:
- Import Bimpk
- Show current node relationships
- Show all nodes
Figure: GraphicsModels node - extended edit options
Importing graphics files#
To use the GraphicsModels node to import a BIMPK or SGPK graphics file, do the following:
- In edit mode, right-click the GraphicsModels node.
- Click the option Import Bimpk.
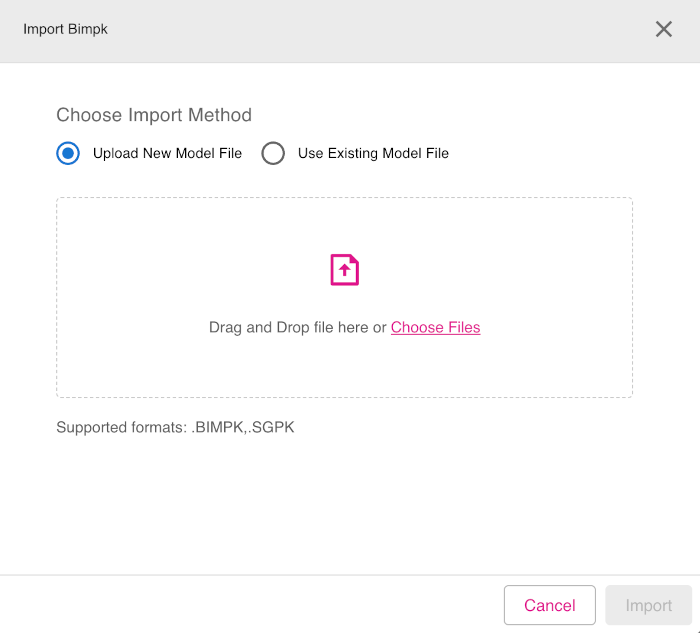
- The Import Bimpk dialog will open. Select the file import method by choosing the options Upload New Model File or Use Existing Model File.
- You can then import the files by dragging and dropping the files into the file upload area or by clicking Choose Files to select files manually.
- When done, click Import to complete the file import process.
Figure: GraphicsModels node - Import Bimpk dialog
UserConfigs node#
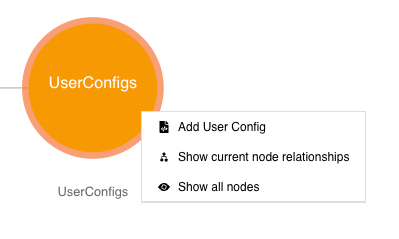
Use the UserConfigs node to add and edit user configurations. Right-click on the UserConfigs node to access these extended edit options:
- Add User Config
- Show current node relationships
- Show all nodes
Figure: UserConfigs node - extended edit options
Adding User Config#
To use the UserConfigs node to add a user configuration, do the following:
- In edit mode, right-click the UserConfigs node.
- Click the option Add User Config.
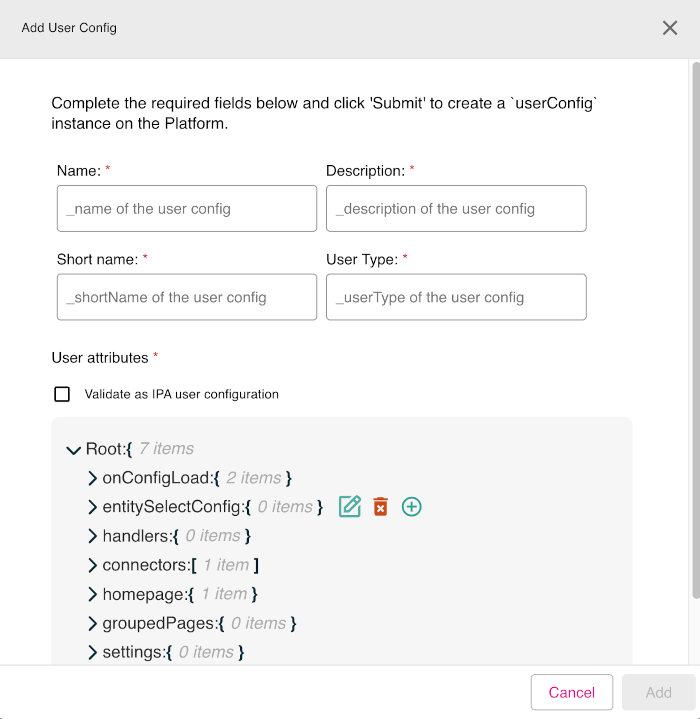
- The Add User Config dialog appears. Enter the mandatory fields: Name, Description, Short name, and User Type.
- In the User attributes section, you can edit every line of the configuration template shown. To edit a line, click on the line and then select the edit icon (indicated by a pencil graphic) which is shown. There are also icons to delete an entry (indicated by a trash can graphic) and an icon to add a new line entry (indicated by a plus sign graphic).
- If you want your configuration to be validated, check the Validate as IPA user configuration check box.
- When done, click Add to add the new user configuration.
Figure: UserConfigs node - Add User Config dialog showing edit icons
OMAPI node#
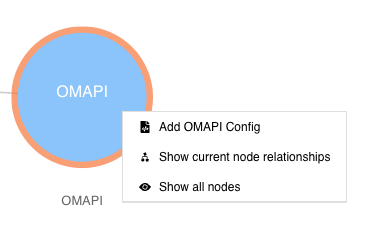
Use the OMAPI node to import Bimpk files. Right-click on the OMAPI node to access these extended edit options:
- Add OMAPI Config
- Show current node relationships
- Show all nodes
Figure: OMAPI node - extended edit options
Adding OMAPI endpoint configuration#
To use the OMAPI node to add a new OMAPI endpoint configuration, do the following:
- In edit mode, right-click the OMAPI node.
- Click the option Add OMAPI Config.
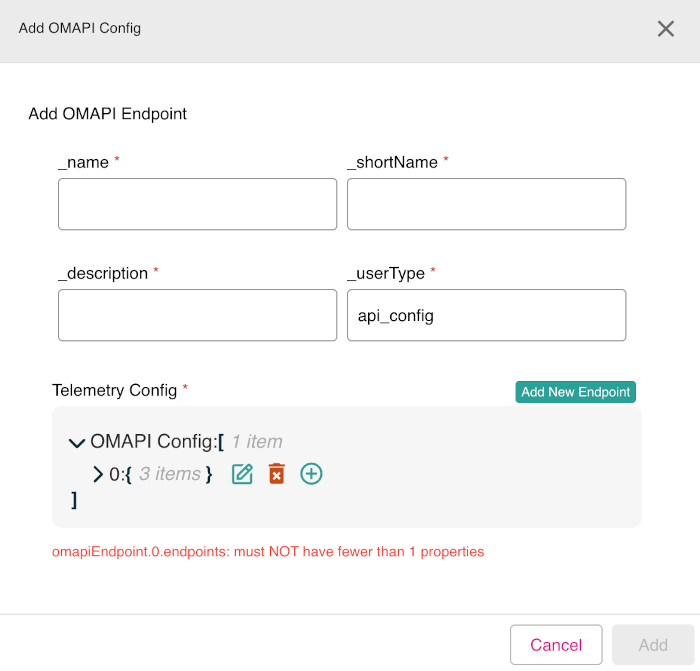
- The Add OMAPI Config dialog appears. In the section Add OMAPI Endpoint, enter the mandatory fields: _name, _shortName, _description, and _userType (by default, set to api_config).
- At this point, you can click Add New Endpoint to add the newly defined endpoint or you can also proceed to the Telemetry Config section to enter the details of the OMAPI endpoint configuration.
- In the Telemetry Config section, you can edit every line of the configuration template shown. To edit a line, click on the line and then select the edit icon (indicated by a pencil graphic) which is shown. There are also icons to delete an entry (indicated by a trash can graphic) and an icon to add a new line entry (indicated by a plus sign graphic).
- When done, click Add to add the new OMAPI configuration.
Figure: OMAPI node - Add OMAPI Config dialog showing edit icons
Scripts node#
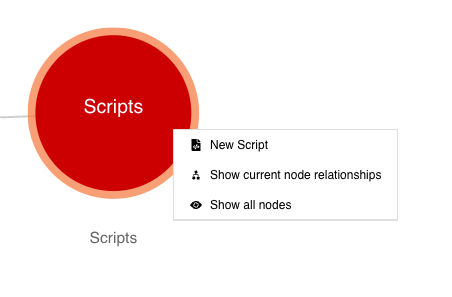
Use the Scripts node to create new scripts. Right-click on the Scripts node to access these extended edit options:
- New Script
- Show current node relationships
- Show all nodes
Figure: Scripts node - extended edit options
Adding a new script#
To use the Scripts node to add a new platform script, do the following:
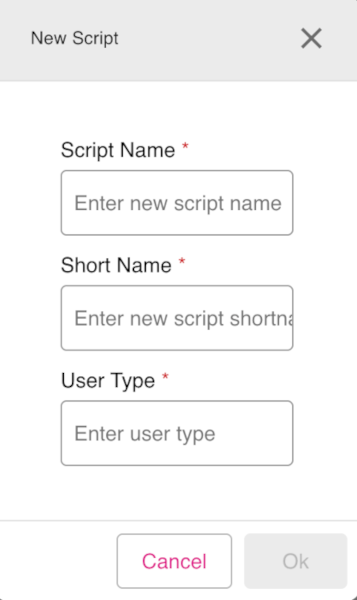
- In edit mode, right-click the Script node. Click the option New Script.
- The New Script dialog appears. Enter the mandatory fields: Script Name, Short Name, and User Type.
- When done, click OK to create the new script.
Figure: Scripts node - New Script dialog
Note: For more information about the scripts editor feature, refer to the Scripts page.
Orchestrators node#
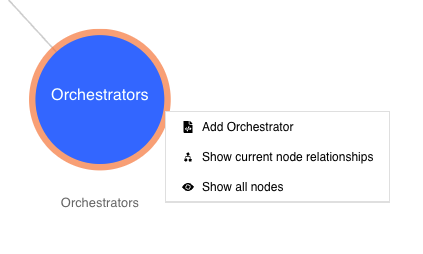
Use the Orchestrators node to add, edit, and run orchestrators. Right-click on the Orchestrations node to access these extended edit options:
- Add Orchestrator
- Show current node relationships
- Show all nodes
Figure: Orchestrators node - extended edit options
Adding a new orchestrator#
To use the Orchestrators node to add a new orchestrator, do the following:
- In edit mode, right-click the Orchestrators node.
- Click the option Add Orchestrator.
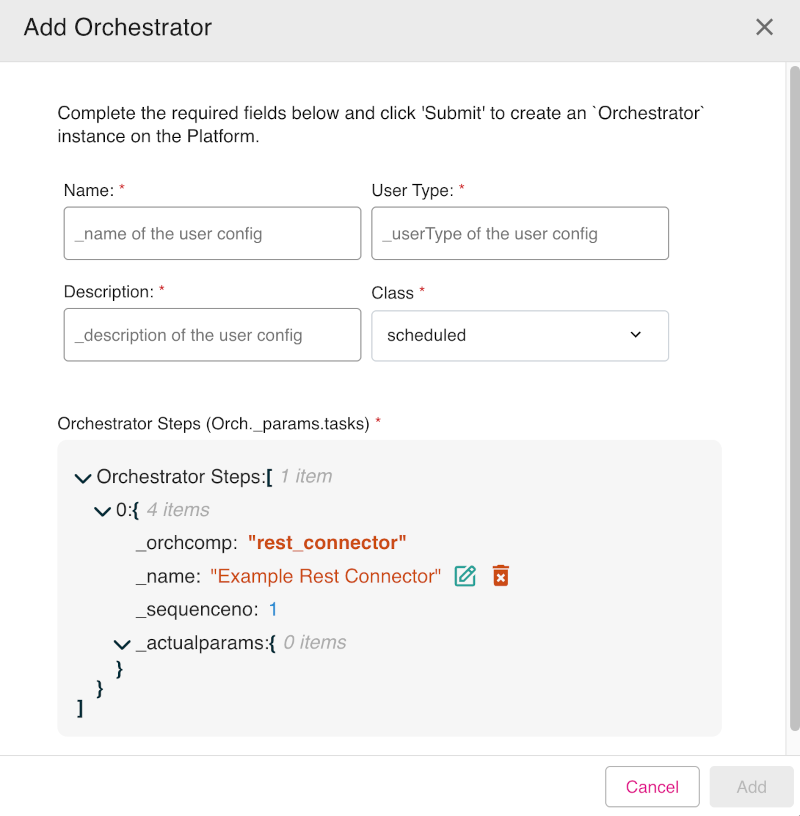
- The Add Orchestrator dialog appears. Enter the mandatory fields: Name, User Type, and Description. Set the Class drop-down option to either scheduled (default) or instant.
- In the Orchestrator Steps section you can set the details of the orchestrator parameter tasks. You can edit every line of the orchestrator steps parameters. To edit a line, click on the line and then select the edit icon (indicated by a pencil graphic) which is shown. There are also icons to delete an entry (indicated by a trash can graphic) and an icon to add a new line entry (indicated by a plus sign graphic).
- When done, click Add to add the new orchestrator.
Figure: Orchestrators node - Add Orchestrator dialog showing edit icons
Telemetry node#
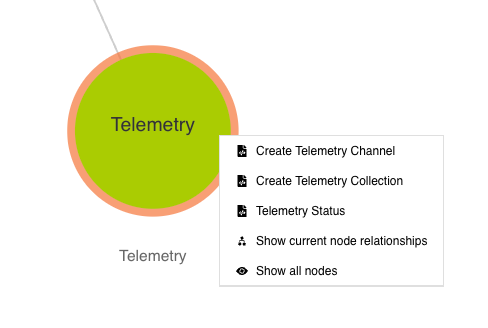
Use the Telemetry node to create and manage telemetry channels. Right-click on the Telemetry node to access these extended edit options:
- Create Telemetry Channel
- Create Telemetry Collections
- Telemetry Status
- Show current node relationships
- Show all nodes
Figure: Telemetry node - extended edit options
Creating a new telemetry channel#
To use the Telemetry node to create a new telemetry channel, do the following:
- In edit mode, right-click the Telemetry node.
- Click the option Create Telemetry Channel.
- The first part of the Create Telemetry Channel dialog appears. This dialog consists of four steps. On Step 1: Configure ActiveMQ Channel, there are instructions on how to configure the ActiveMQ message broker which is used to convey telemetry information. When you have read the instructions, click Next to proceed to the next dialog.
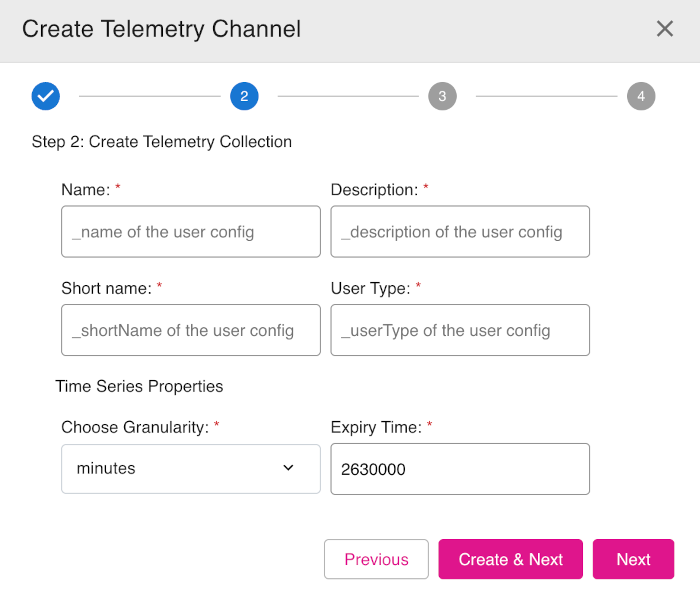
- In the Step 2: Create Telemetry Collection dialog, enter the required information into the mandatory fields: Name, Description, Short name, and User Type.
- In the Time Series Properties section, from the drop-down box Choose Granularity, select seconds, minutes, or hours (default is minutes).
- In the Expiry Time field, enter the default time-out period for the telemetry channel (default is set to 2630000, units depend on the granularity setting).
- Click either Create & Next or Next to proceed.
- On the Step 3: Create Telemetry Items dialog, you can define telemetry items to add to your telemetry collection.
- On the final section, Step 4:, confirm the information as required to complete the process.
Figure: Telemetry node - Create Telemetry Channel dialog - Step 2
Ontologies node#
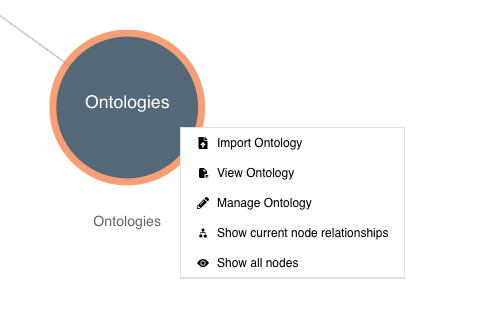
Use the Ontologies nodes to import, view, and manage ontologies. Right-click on the Ontologies node to access these extended edit options:
- Import Ontology
- View Ontology
- Manage Ontology
- Show current node relationships
- Show all nodes
Figure: Ontologies node - extended edit options
Note: For information on importing, viewing, and managing ontologies, refer to the Ontologies page.