A First Conversation
Prepare Your Project#
Obtain an OpenAI Key#
Refer to the Open AI Developer Quick Start for more information on signing up with OpenAI and generating your API key.
Record your key for use in a future step.
Create a Project#
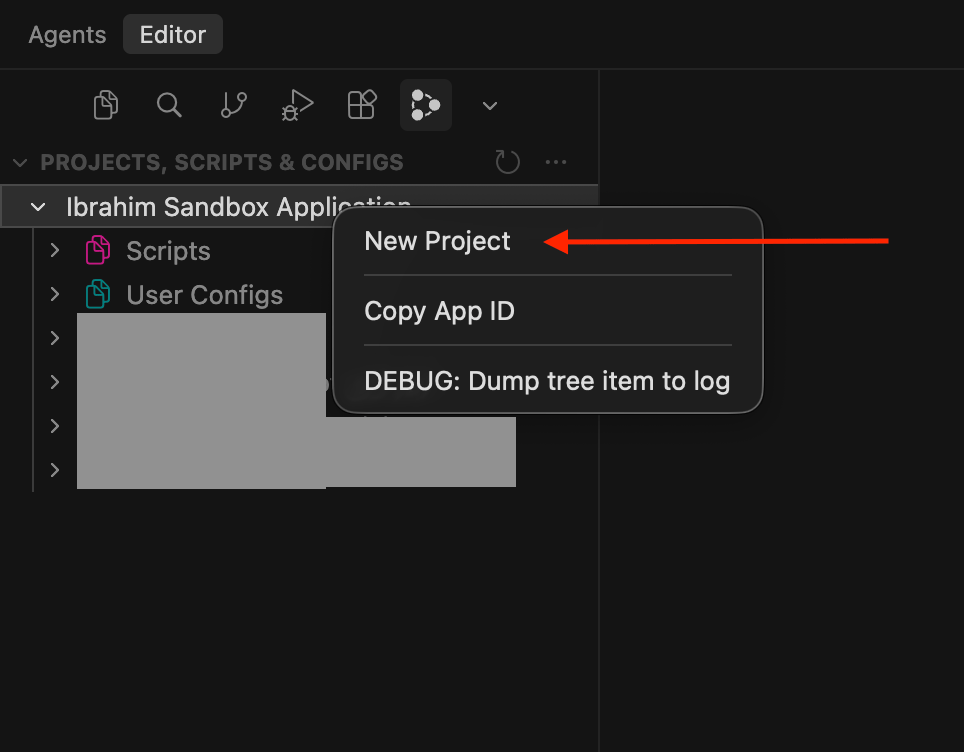
The first step is to ensure you have a functioning project. If you already have one, you can move on to the next step, Adding your OpenAI API key. If not, you can create a new project by right-clicking your application in the Twinit IDE and selecting “New Project.” You will be prompted to provide basic details such as the project name, and the IDE will generate the project under the application you selected.
Add your OpenAI API Key#
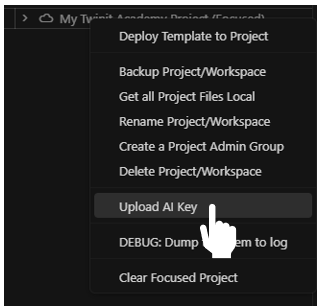
To add an OpenAI key to your project using the Twinit IDE, simply right-click your project and choose “Upload AI Key.” After selecting this option, an input box will appear where you can select openai and paste your OpenAI key. Once submitted, the key is securely uploaded to the appropriate location within the Passport Service Secrets. The Twinit AI Service then uses this token automatically when communicating with OpenAI services.
- Continue using Code
- Continue using IDE Extension
Deploy the Course Materials#
- Download AI01 - Intro to Twinit AI.zip
- Using the Twinit IDE Extension, right-click on your project and select 'Deploy Template to Project'
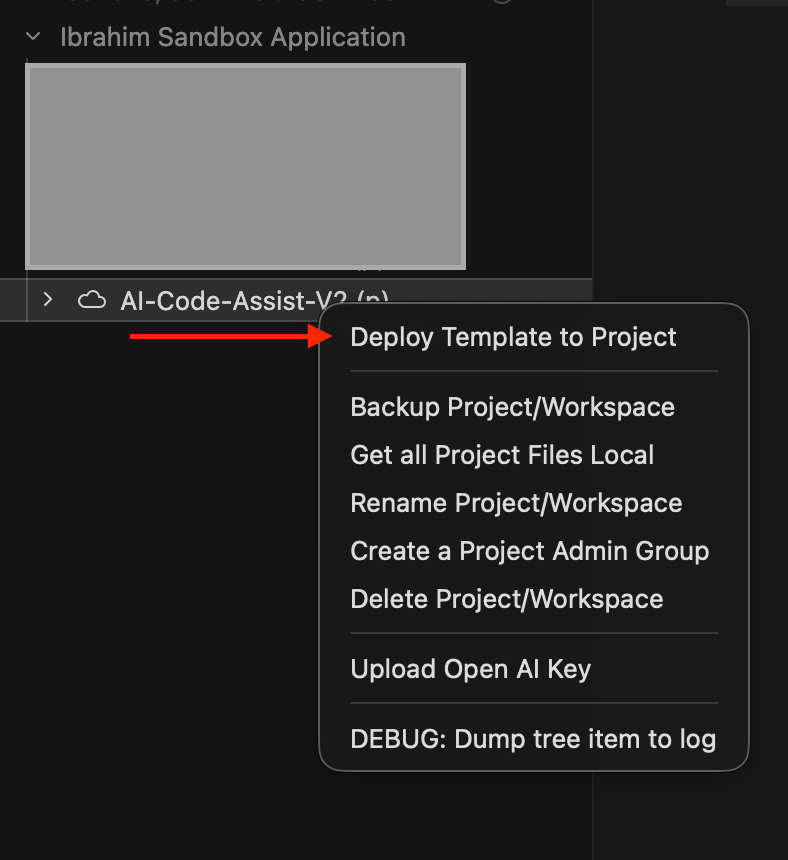
- When prompted to select a file, pick the zip file you downloaded in the previous step
This will deploy a script to your project. We will use this script in the next step.
Create Your First Agent#
We are now ready to create our first Agent.
Open the 'AI01 - Intro to Twinit AI' script from Twinit.
The script contains a createAgent function which we will use to create our first Twinit AI Agent. This Agent is a Mathematics Agent that uses OpenAI's gpt-4o model to solve mathematics problems. For this introductory example the Agent does not need any additional Tools, so the _tools array is left empty — the Agent will rely solely on the underlying LLM to reason about and answer the user's question. Below is an example of how the Agent should be configured.
{ _name: "Mathematics Agent", _background: "You are a maths professor who is good at solving mathematics problems.", _userType: "mathematicsAgent", _namespaces: ctx.project._namespaces _config: { _model:"gpt-4o", _provider: "openai" }, _tools: []}- _name: Specifies the name of the Agent.
- _background: Describes the background or role of the Agent. In this example we tell the Agent it is a maths professor who is good at solving mathematics problems.
- _userType: Identifies the user type of the Agent, often used for identifying this Agent. The Team we create in the next step will reference this value.
- _namespaces: An array containing the namespaces of your project, usually derived from the context object.
- _config: Defines the provider and model the Agent will use. In this example we use
openaias the provider andgpt-4oas the model. - _tools: Lists the tools assigned to the Agent, determining its functional capabilities. For this example the array is empty, since the Agent does not need any additional capabilities to answer mathematics questions.
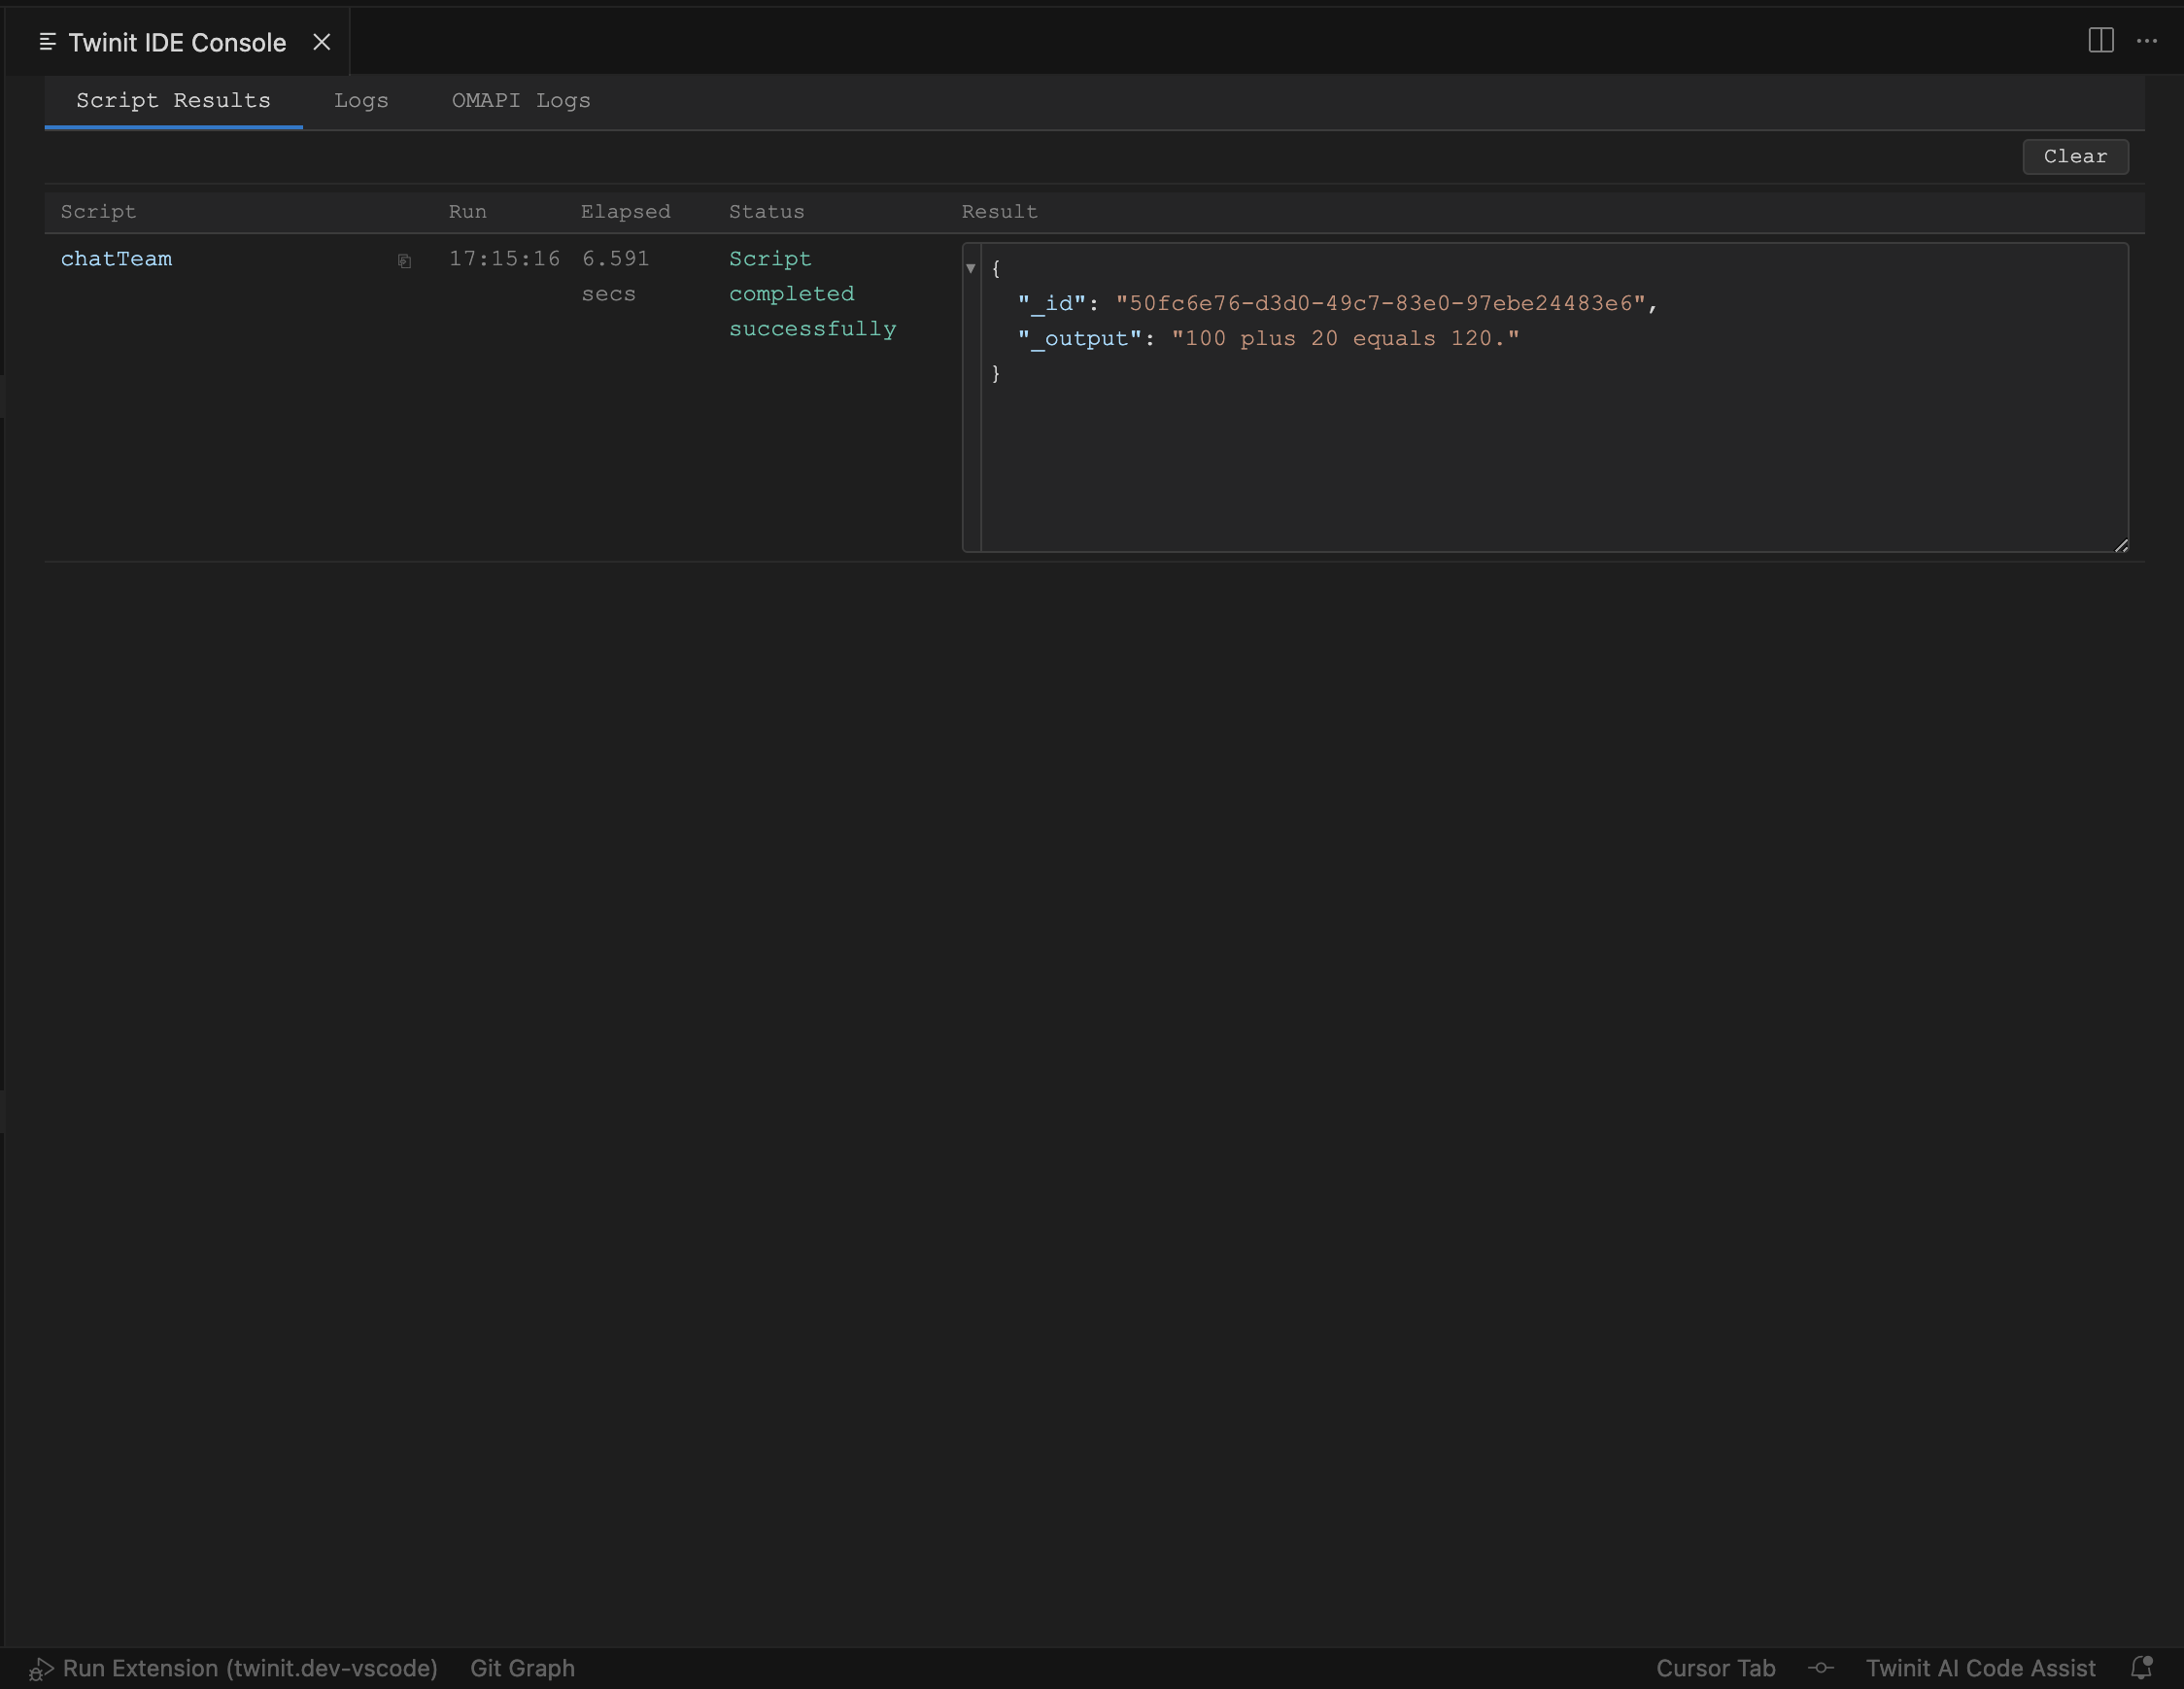
You can now right click on the script and run the createAgent function in the provided file to create your first Agent. Be sure to inspect the results of the script to understand Twinit's response.
Create Your First Team#
We are now ready to create our first Team. This Team will make use of the Mathematics Agent we just created, linking to it through the Agent's _userType. It will be used to answer mathematics questions in the next step. Next, we define the workflow for the Team. Since this is our first example, the flow is simple, involving only a single Agent.
However, the Twinit AI Service allows you to create more complex workflows by adding multiple Agents to a Team. Each Agent can handle a specific part of the process, passing its output to the next Agent in line. This enables the orchestration of multi-step, autonomous workflows capable of tackling more sophisticated tasks. By carefully structuring Teams, you can combine Agents with different tools and models to create robust, modular, and reusable workflows that scale with your project's requirements.
Below is an example of how the Team should be configured.
const team = { _name: "Mathematics Team", _agents:[ { _userType: "mathematicsAgent" } ], _flow:[ { from: "__start__", to: "mathematicsAgent" }, { from: "mathematicsAgent", to:"__end__" } ], _namespaces: ctx.project._namespaces}- _name: Specifies the name of the Team.
- _agents: An array that defines the Agents included in the Team, identified by their _userType. In this example we include only the
mathematicsAgent. - _flow: An array that defines the workflow, specifying the order in which Agents execute their tasks. Each entry has a
fromandtofield. The reserved nodes__start__and__end__mark where the workflow begins and ends. In this example the flow goes from__start__→mathematicsAgent→__end__. - _namespaces: An array containing the namespaces of your project, usually derived from the context object.
You can now run the createTeam function in the provided file to create your first Team.
Make sure to record the _id of the Team you just created as we will use it in the next step, while communicating with the Team.
Start Your First Conversation#
Once you have created your Agent and associated it with a Team, you can interact with the Team by sending queries or requests. In this example, we will chat with the Mathematics Team we just created and ask it a simple math question. The Team will route the request to the Mathematics Agent, which uses the underlying LLM to compute and explain the answer.
Below is an example of how a chat with the Team should be configured. This setup ensures that your queries are routed through the appropriate Agent workflow, allowing the Team to process the request, apply the assigned tools, and return accurate and helpful results.
const body = { _input:{ message: "What is 100 plus 20?" }, _teamId:{{your-team-id}}, ...(convId ? {_id:convId } : {})}- _input: The query or request from the user, supplied as an object. In this example the script sends
{ message: "What is 100 plus 20?" }. - _teamId: Specifies the ID of the Team that should handle the query. Use the _id from the team you created in the previous step.
- _id: Defines the ID of the entire conversation. This allows the AI to maintain context, remember previous interactions, and build responses based on the ongoing conversation. Leave it
undefinedto start a new conversation.
Update the _teamId in the script to be the _id of the team you created in the createTeam step and save the file.
Hint: If you lost your team _id you can run the
getTeamsscript to get the list of teams in your project.
You can now run the chatTeam function in the provided file to chat with your Team. Be sure to inspect the script result to see how the Mathematics Agent returns the answer to your question.
The response will include an _id. This _id can be used to continue an existing conversation.
Create Your First Agent#
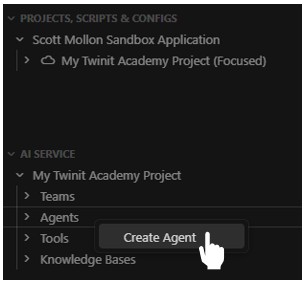
- In the Twinit IDE Extension expand the AI Service panel
- Expand your project in the tree
- Right click on the Agents node and select 'Create Agent'
- In the Create Agent form enter these values:
- Name: Mathematics Agent
- Description: My First Agent
- Background: You are a maths professor who is good at solving mathematics problems.
- User Type: mathematicsAgent
- Provider: Select openai if it is not already selected
- Model: Select gpt-4o
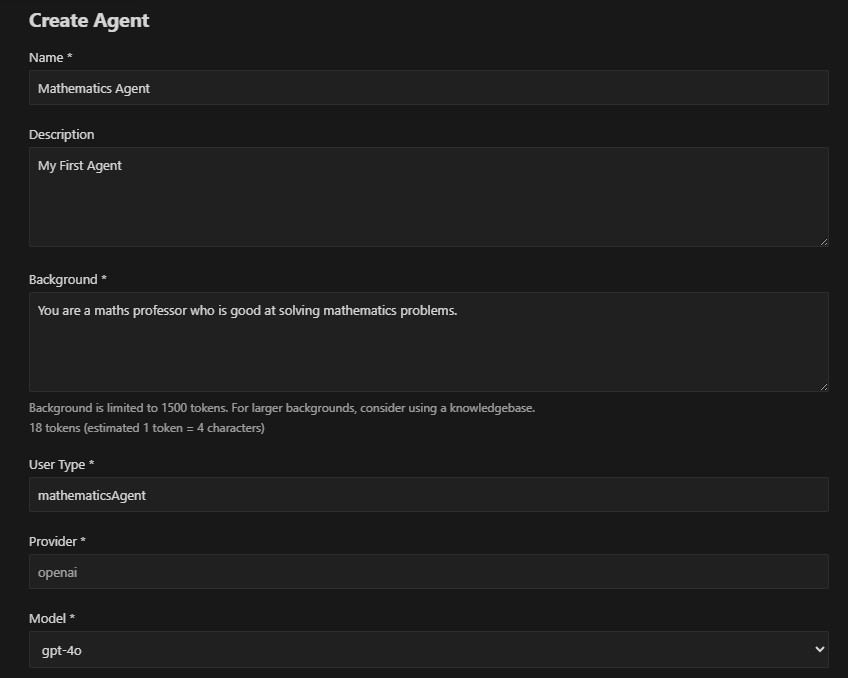
- Click the Save Agent button
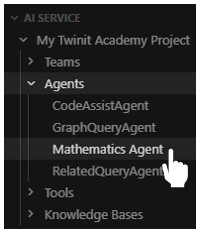
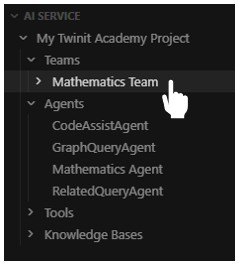
Your new agent will appear in the Agents tree.
Create Your First Team#
- Right click on the Teams node in the AI Service panel
- Select Create Team
- In the Create Team form enter these values:
- Name: Mathematics Team
- Agents: Check the Mathematics Agent
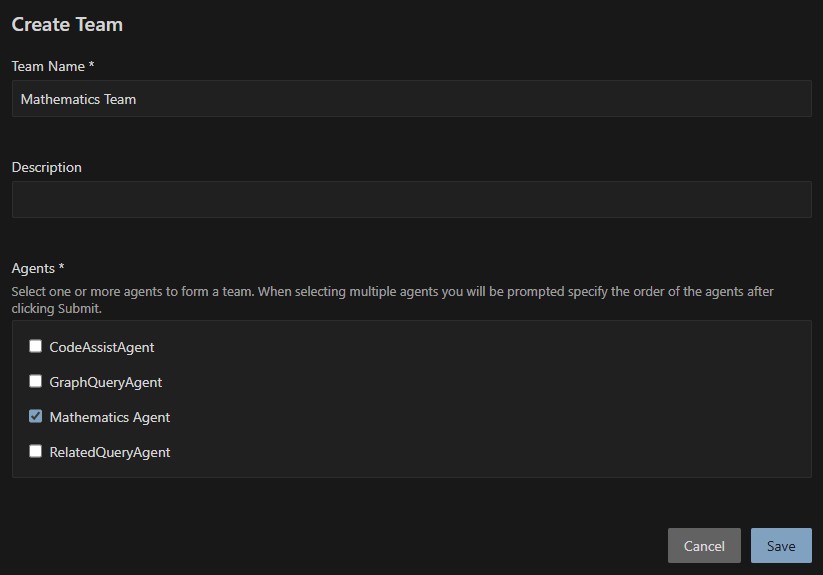
- Click Save
Your new team will appear in the Teams tree.
Start Your First Conversation#
- Right-click your new team and select Chat with team.
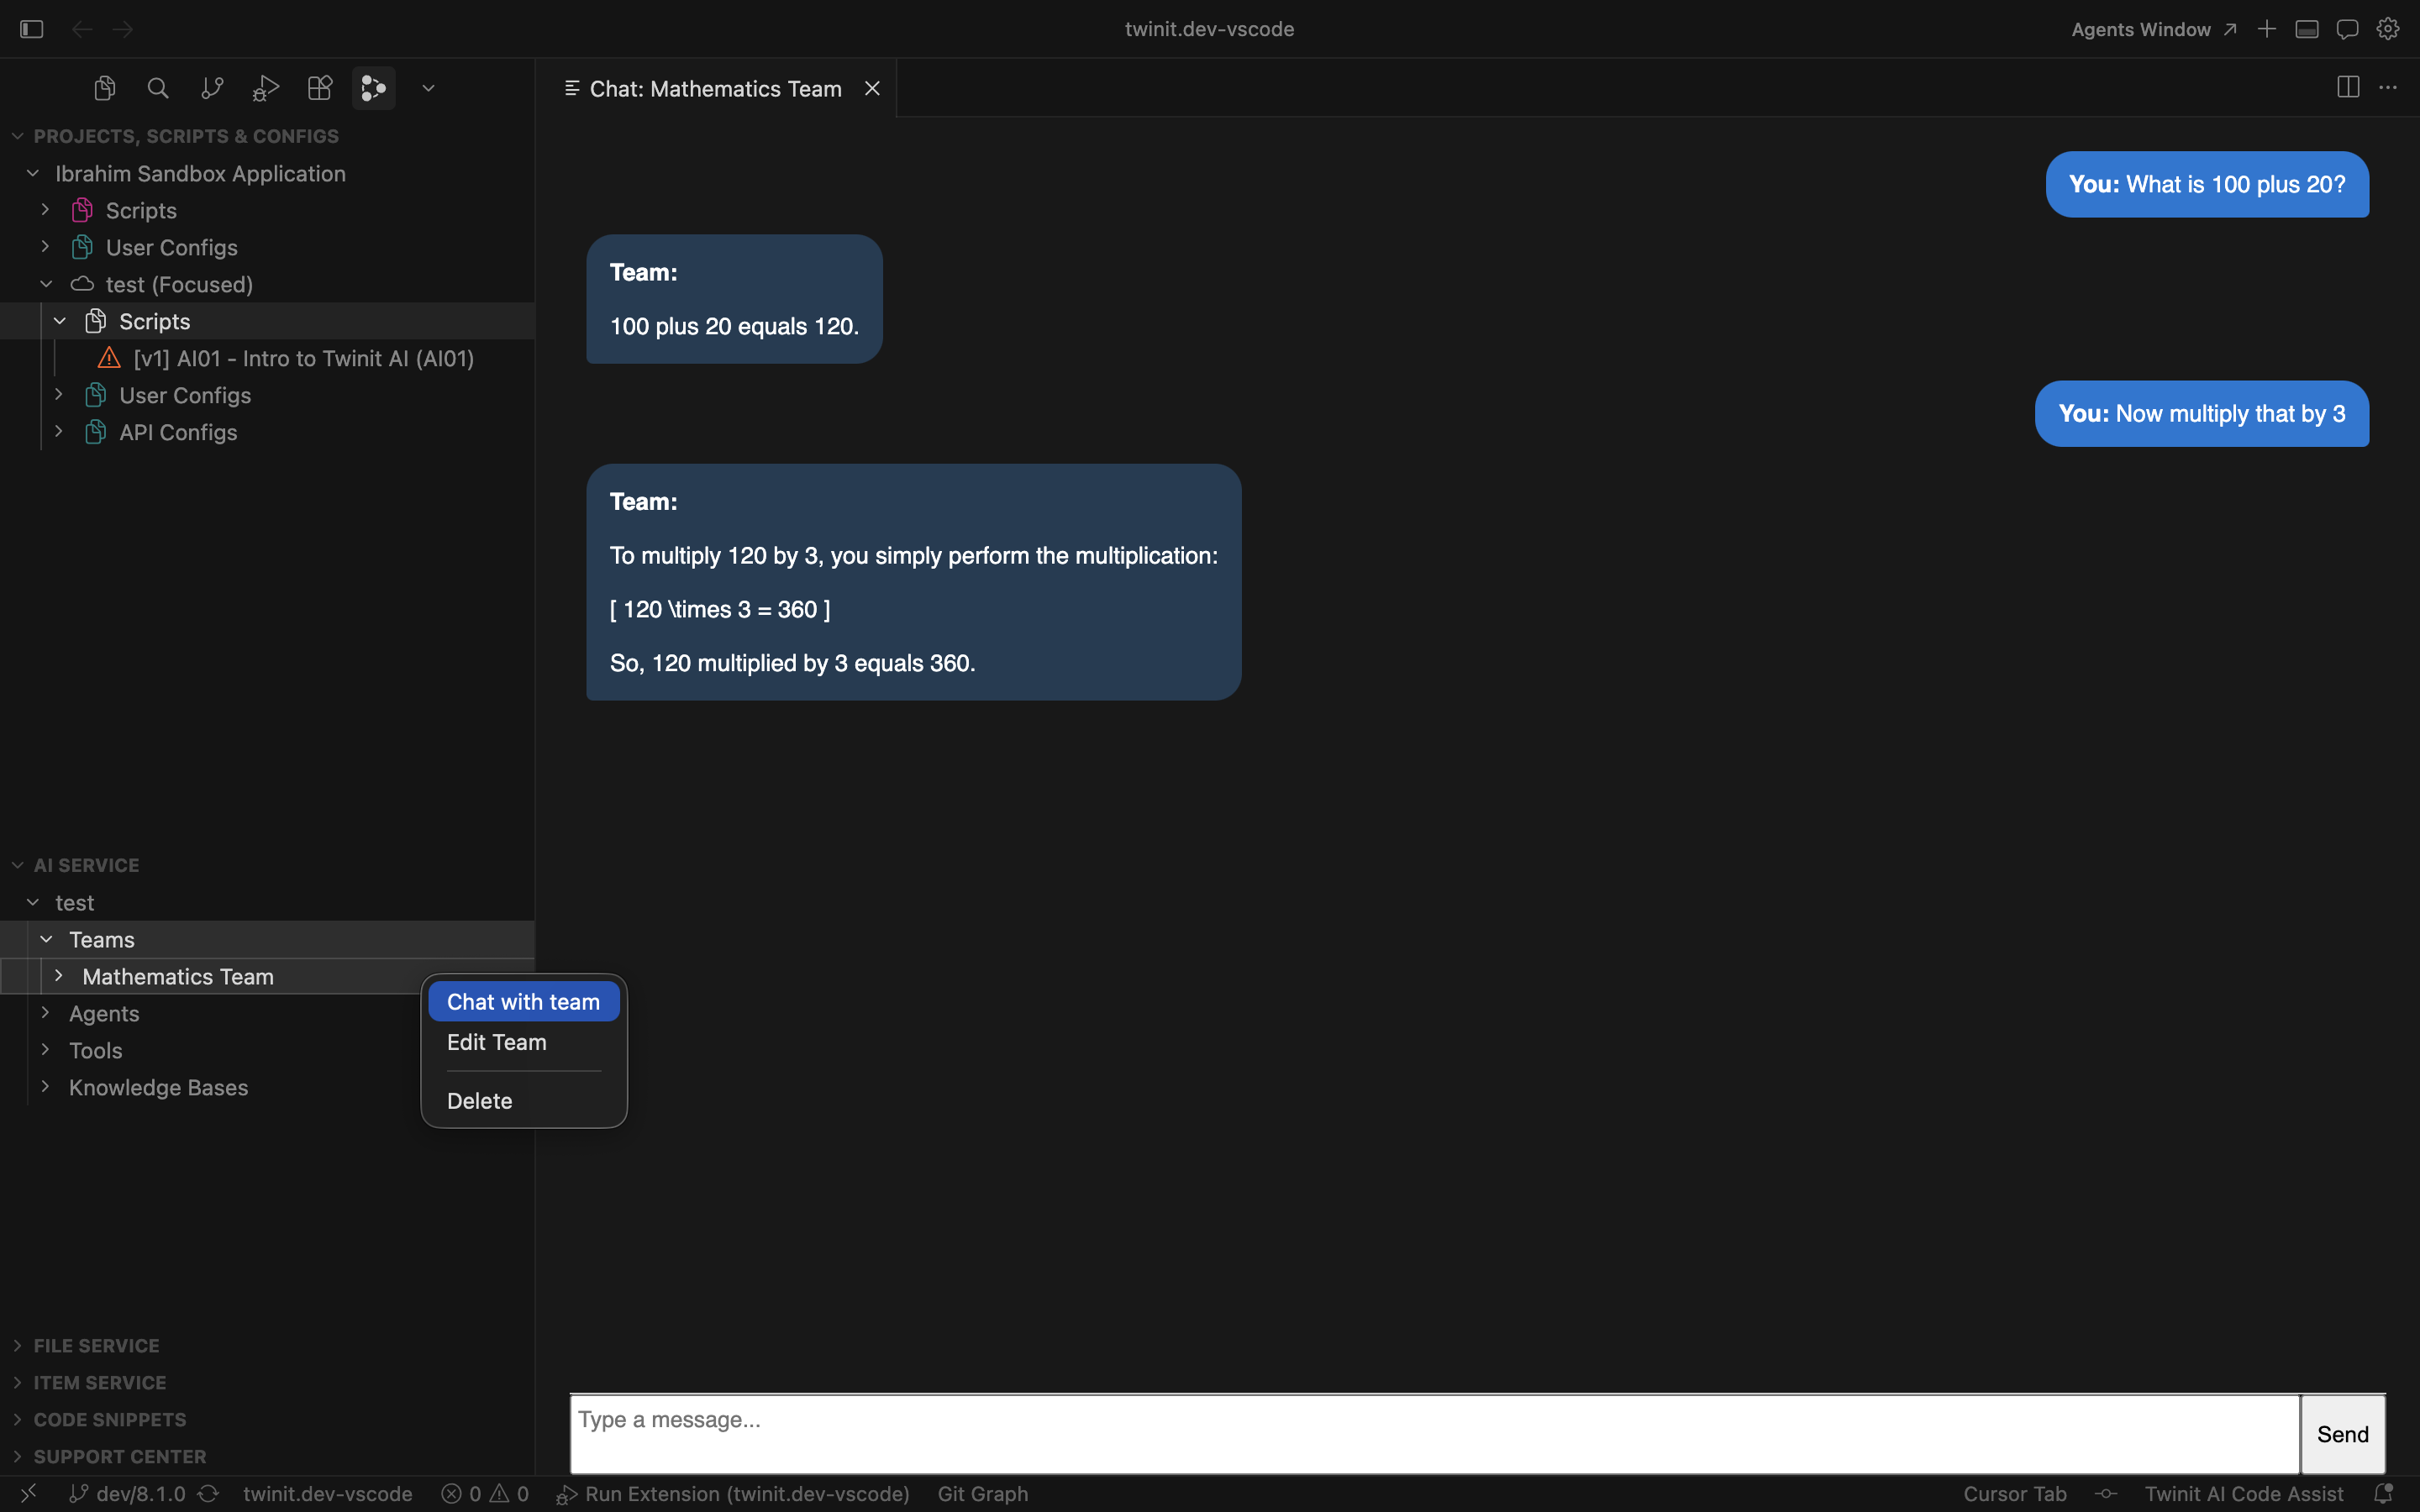
A chat panel will open beside your editor where you can type messages and see the Team's responses. Behind the scenes the extension is calling the same createConversation endpoint as the script, but it manages a few things for you:
- It checks that an OpenAI key is configured for the project and prompts you if one is missing.
- It automatically wires the team's
_idinto the request, so you don't need to copy it anywhere. - It keeps track of the conversation
_idreturned by the first response and reuses it for every subsequent message in the panel, so the Team retains context across the conversation.
Try asking the Mathematics Team a few follow-up questions in the chat panel (for example, "What is 100 plus 20?" followed by "Now multiply that by 3") to see how the Agent uses conversation context to build on previous answers.