Workflow Studio
Overview
Use Workflow Studio to create and manage workflow definitions, run workflows, and schedule them. For more information about workflows, see Workflow Service.
When you open a workflow, Workflow Studio shows three tabs:
- Editor: edit the workflow graph.
- Runs: see the workflow's executions.
- Schedules: run the workflow on a schedule.
The tabs stay open as you work on the selected workflow.
Figure: Workflow Studio flow

Workflow Studio permissions
Workflow Studio checks your Workflow Service permissions to read, create, edit, copy, delete, and run workflows. If Workflow Studio can't confirm a permission, it doesn't offer that action.
Managing workflow definitions
From the workflow list, you can do the following:
- Search for a workflow.
- Open a workflow.
- Create a workflow. Select New workflow.
- Copy a workflow.
- Delete a workflow.
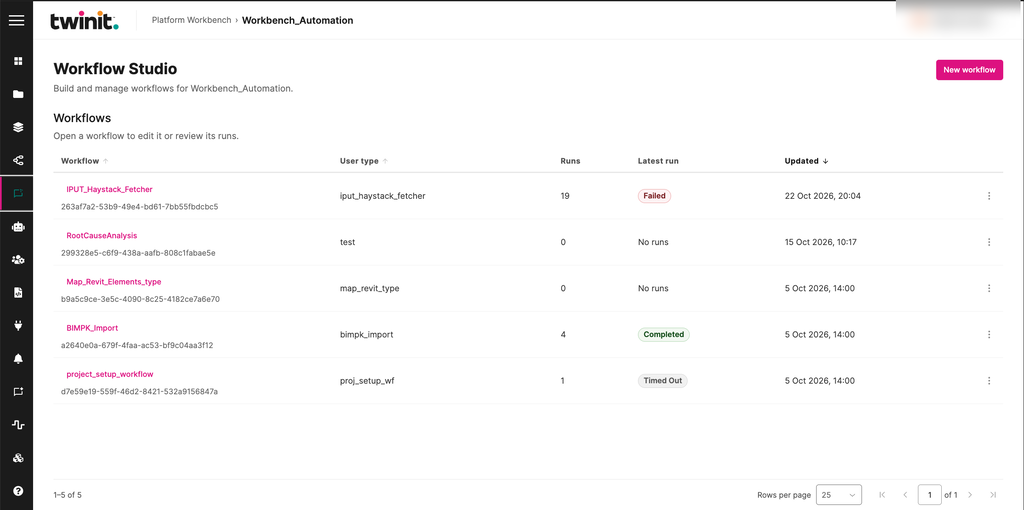
The list shows each workflow's user type, number of runs, latest run status, and last update. It shows up to 500 workflows.
Figure: Workflow list
If you leave a workflow with unsaved changes, Workflow Studio asks you to confirm. This includes closing the browser tab.
Note: Workflow definitions have no draft or live versions.
Editing a workflow
To edit a workflow, do the following:
- Open the workflow.
- Select the Editor tab.
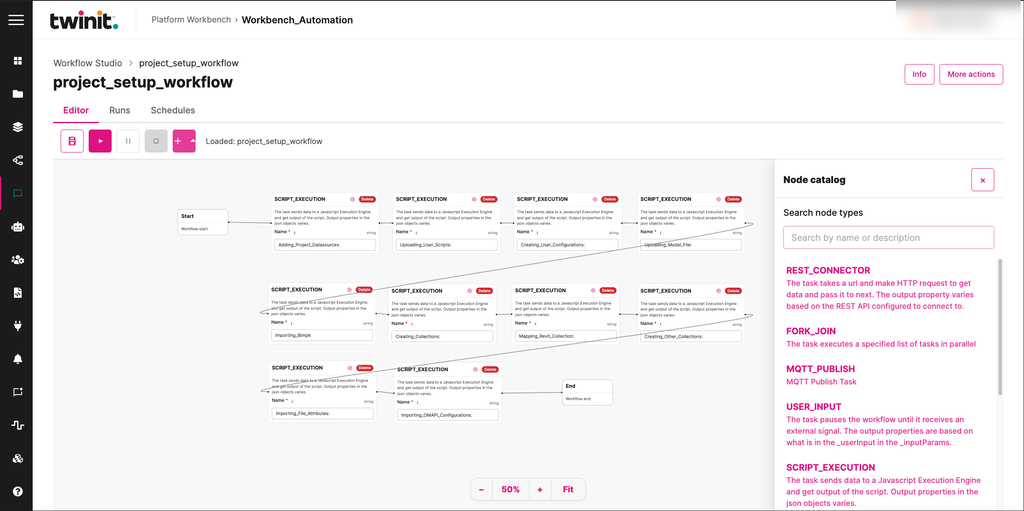
- To add a task, select + in the editor toolbar to open the Node catalog, then select a task type.
- To configure a task, select the gear icon on the task. Workflow Studio opens the task configuration drawer.
- To save the workflow, select the save icon in the toolbar.
The Editor offers the project's AI teams as options. For more information, see AI Service.
Figure: Workflow Studio Editor tab
Running a workflow
You can run, pause, and stop workflow executions.
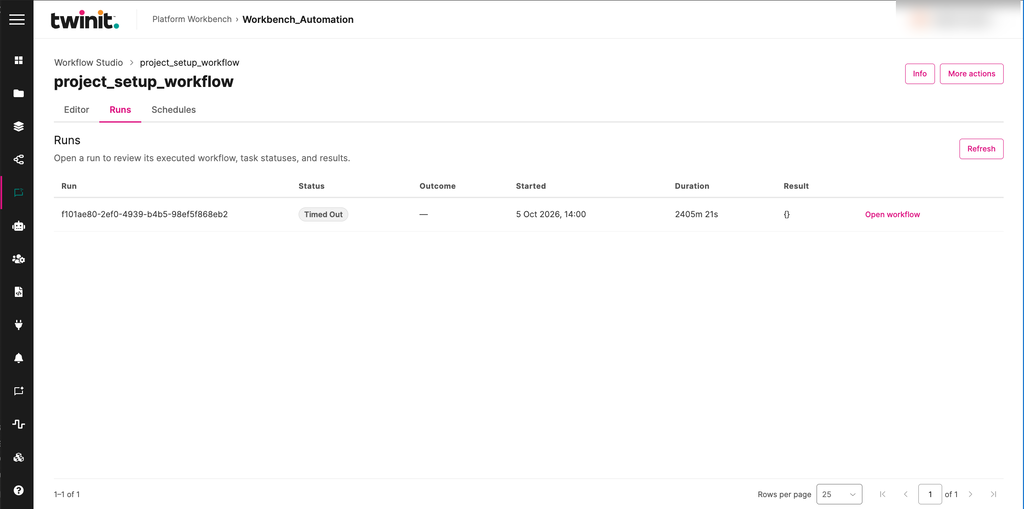
To see a workflow's executions, select the Runs tab. For each run, you can see the following:
- The run history, one page at a time
- The raw run details
- The recorded execution graph
- The status and result of each task
To open a run's recorded execution graph, select Open workflow in the run's row. To reload the list, select Refresh.
Switch and do-while structures stay visible in the execution graph. The Runs tab can't show tasks that the run didn't record.
Figure: Workflow Studio Runs tab
Responding to a user input task
If a run is waiting at a USER_INPUT task, the Runs tab shows a response form. To continue the run, fill in the form and submit it.
Scheduling a workflow
To create a schedule, do the following:
- Select the Schedules tab.
- Select Create schedule.
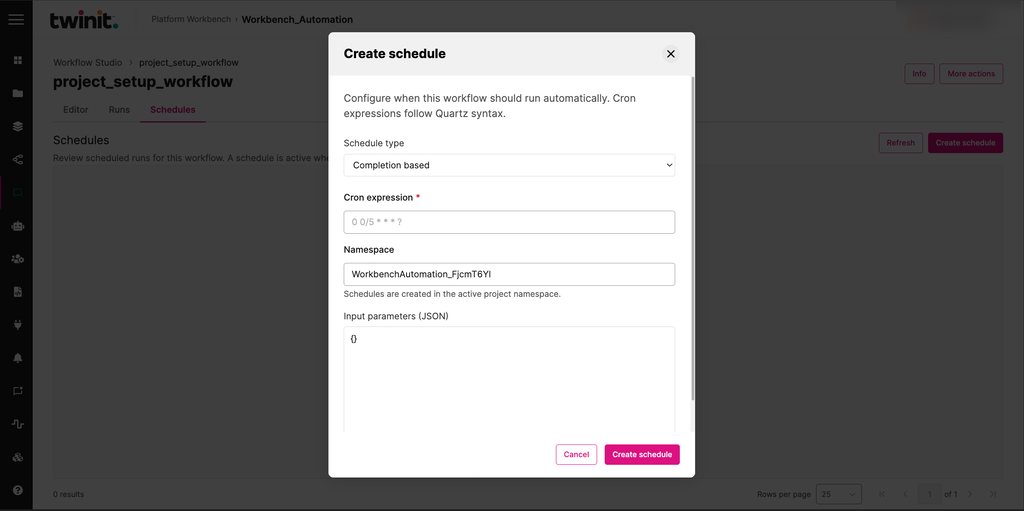
- In the Schedule type list, select the type of schedule.
- In the Cron expression field, enter a cron expression. Cron expressions use Quartz syntax.
- Check the Namespace field. Workbench creates schedules in the active project namespace.
- Optionally, in the Input parameters (JSON) field, enter the workflow's input parameters.
- Select Create schedule.
Figure: Create schedule dialog
On the Schedules tab, you can also do the following:
- Edit a schedule.
- Set a schedule to active or inactive.
- See when the schedule runs next.
- Open a schedule's details.
- Delete a schedule.
For more information, see Workflow scheduling.